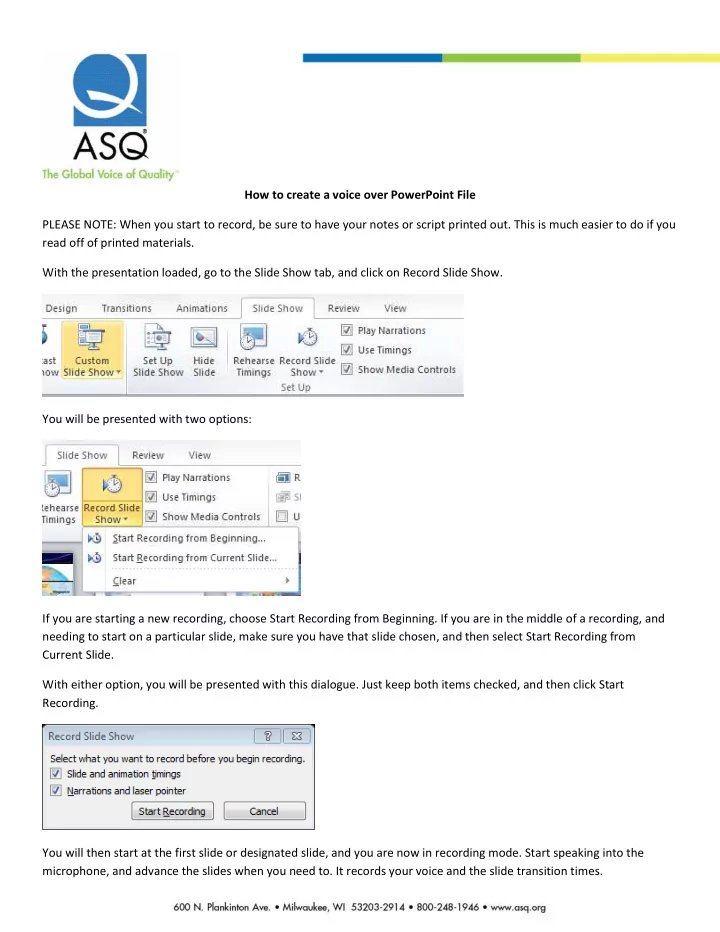

How to create a voice over PowerPoint File PLEASE NOTE: When you start to record, be sure to have your notes or script printed out. This is much easier to do if you read off of printed materials. With the presentation loaded, go to the Slide Show tab, and click on Record Slide Show. You will be presented with two options: If you are starting a new recording, choose Start Recording from Beginning. If you are in the middle of a recording, and needing to start on a particular slide, make sure you have that slide chosen, and then select Start Recording from Current Slide. With either option, you will be presented with this dialogue. Just keep both items checked, and then click Start Recording. You will then start at the first slide or designated slide, and you are now in recording mode. Start speaking into the microphone, and advance the slides when you need to. It records your voice and the slide transition times.
Note: If the presentation as animations, you might want to disable them so you can move between slides with a single click. To disable animations, click on the Set Up Slide Show option in the first image above, and you will be presented with this window: Select “Show without animation” and then Click OK. Animations require extra clicks, and could throw you off when trying to time what you say with the clicks (especially if you are doing a voice-over for a presentation made by someone else). If you need to redo the current slide, just press Escape. It will take you to a screen that looks like this: Slide 1 and 2 both have narration (indicated by the little star in the bottom left corner) and timing (indicated by the time to the right of the star). Slide 3 has no narration, but does have timing. Slide 4 has nothing recorded for it yet. The yellow border around slide 3 indicates that it is the “current” slide.
So to start over, just select the Start Recording From Beginning option mentioned earlier. If you want to pick up where you left off, in the above example slide 4, then select the slide and pick Start Recording From Current Slide. If you need to just go back and edit a particular slide, perhaps slide 2 in the above example, click on slide 2 then select Start Recording From Current Slide. When you have finished your recording for the slide, just click Escape to stop from advancing to the next slide and having to record that one over as well. If you are prepared, you could just start recording and go straight through the entire presentation in one take.
Recommend
More recommend