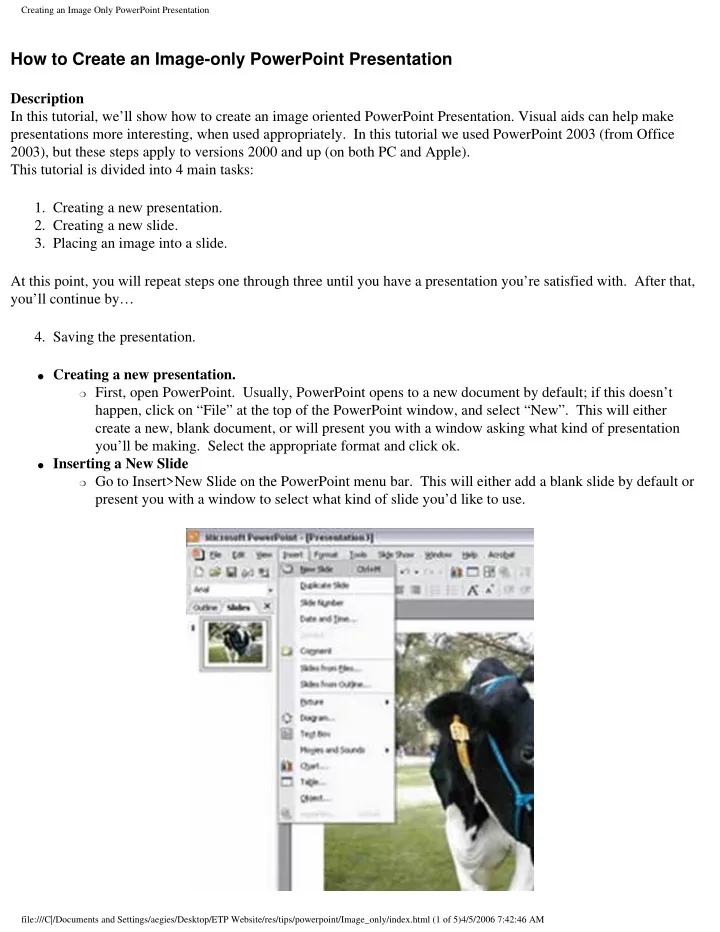

Creating an Image Only PowerPoint Presentation How to Create an Image-only PowerPoint Presentation Description In this tutorial, we’ll show how to create an image oriented PowerPoint Presentation. Visual aids can help make presentations more interesting, when used appropriately. In this tutorial we used PowerPoint 2003 (from Office 2003), but these steps apply to versions 2000 and up (on both PC and Apple). This tutorial is divided into 4 main tasks: 1. Creating a new presentation. 2. Creating a new slide. 3. Placing an image into a slide. At this point, you will repeat steps one through three until you have a presentation you’re satisfied with. After that, you’ll continue by… 4. Saving the presentation. ● Creating a new presentation. ❍ First, open PowerPoint. Usually, PowerPoint opens to a new document by default; if this doesn’t happen, click on “File” at the top of the PowerPoint window, and select “New”. This will either create a new, blank document, or will present you with a window asking what kind of presentation you’ll be making. Select the appropriate format and click ok. ● Inserting a New Slide ❍ Go to Insert>New Slide on the PowerPoint menu bar. This will either add a blank slide by default or present you with a window to select what kind of slide you’d like to use. file:///C|/Documents and Settings/aegies/Desktop/ETP Website/res/tips/powerpoint/Image_only/index.html (1 of 5)4/5/2006 7:42:46 AM
Creating an Image Only PowerPoint Presentation ● Inserting Image Into Slide ■ First, you may want to change the slide layout ■ Go to the Format/Slide Layout ■ Choose the “content” layout from the content layouts section of the Task Pane. It’s the top right choice in the content layouts section. ■ Choose the “insert picture” icon. file:///C|/Documents and Settings/aegies/Desktop/ETP Website/res/tips/powerpoint/Image_only/index.html (2 of 5)4/5/2006 7:42:46 AM
Creating an Image Only PowerPoint Presentation ❍ Navigate to your image file ❍ Choose your image and either double click it, or click insert, which will insert your picture. Alternately, you may also select “Insert” on the menu bar and click on Picture>From File. You would then navigate to your image file as described above. ● Saving the Presentation ❍ On the PowerPoint menu bar, select File>Save for a new presentation or for permanent changes to your preexisting document, or select “Save As” to save a new version of your presentation. file:///C|/Documents and Settings/aegies/Desktop/ETP Website/res/tips/powerpoint/Image_only/index.html (3 of 5)4/5/2006 7:42:46 AM
Creating an Image Only PowerPoint Presentation ❍ Decide on a place to save your presentation and navigate to that folder. file:///C|/Documents and Settings/aegies/Desktop/ETP Website/res/tips/powerpoint/Image_only/index.html (4 of 5)4/5/2006 7:42:46 AM
Creating an Image Only PowerPoint Presentation ❍ Enter a file name for your presentation and click “Save”. Try to select a name that makes the presentation easily identifiable. file:///C|/Documents and Settings/aegies/Desktop/ETP Website/res/tips/powerpoint/Image_only/index.html (5 of 5)4/5/2006 7:42:46 AM
Recommend
More recommend