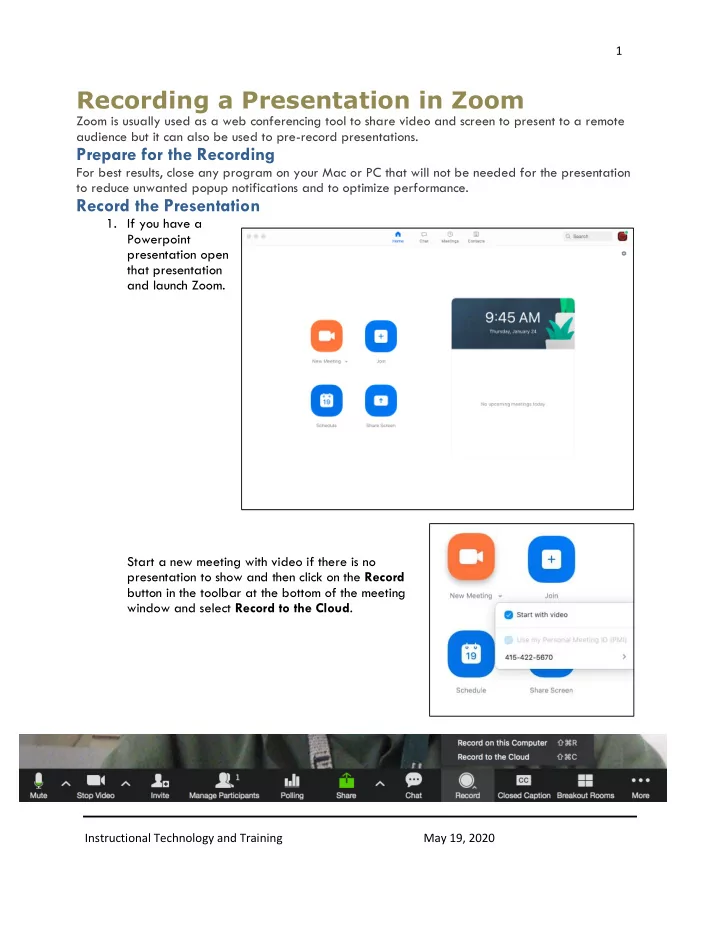

1 Recording a Presentation in Zoom Zoom is usually used as a web conferencing tool to share video and screen to present to a remote audience but it can also be used to pre-record presentations. Prepare for the Recording For best results, close any program on your Mac or PC that will not be needed for the presentation to reduce unwanted popup notifications and to optimize performance. Record the Presentation 1. If you have a Powerpoint presentation open that presentation and launch Zoom. Start a new meeting with video if there is no presentation to show and then click on the Record button in the toolbar at the bottom of the meeting window and select Record to the Cloud . Instructional Technology and Training May 19, 2020
2 If you have a Powerpoint presentation to show, launch that Powerpoint file and start a new meeting. Then click on Share Screen in the tools at the bottom of the meeting. 2. You will see a selection of choices to share-select your presentation as the item to share. If you have audio in your presentation be sure to check the box Share computer sound . Click Share Screen in the lower right corner of the share window to continue. 3. At the top of the screen you will see a green bar with the meeting room ID; placing your cursor over that bar will reveal a set of tools. In the More menu, select Record to the Cloud to begin recording. 4. Wait a moment until you see a small cloud icon with the blinking red dot confirming that you are recording. 5. Proceed through your presentation as if you were presenting in class. Instructional Technology and Training May 19, 2020
3 6. When you finish, pause a moment and then click on the stop record button in the bottom toolbar for a video presentation. For a presentation that includes a Powerpoint slideshow click on the More menu again and select Stop Recording . 7. End the meeting and your recording will be processed on the Zoom server. View and share the recording 1. Login to your Zoom account and select Recordings on the left side of the page. You can see the list of recordings from past meetings. Click on the link for one of the recordings to view the Recording Details. 2. In the Recording Details page, click on the Share icon will provide sharing permissions and options. Instructional Technology and Training May 19, 2020
4 Here you can select whether the recording is publicly available or only to the USF authenticated users. You can also change whether the recording can be downloaded as a video file. Finally, the default setting is to require a password and you can choose a password of your choice or disable the option. You can actually preview and trim the video and edit the transcripts if you need to by clicking on the recording icon on the Recording Details page. Instructional Technology and Training May 19, 2020
5 3. Once in the recording, click on the play icon to preview the recording; to edit, click on the Scissors icon at the bottom right side of the player. This will bring up the editor where you can move the end sliders to trim the beginning and end of the video. Click Save to finish. 4. Back in the recording details page, you can click on the link Copy Shareable Link to copy the recording web link to share in an email. Instructional Technology and Training May 19, 2020
6 5. When the recording is ready, you will also receive an email from Zoom with the link to share the recording. You can then copy and paste the link Share recording with viewers into an email to share. Instructional Technology and Training May 19, 2020
Recommend
More recommend