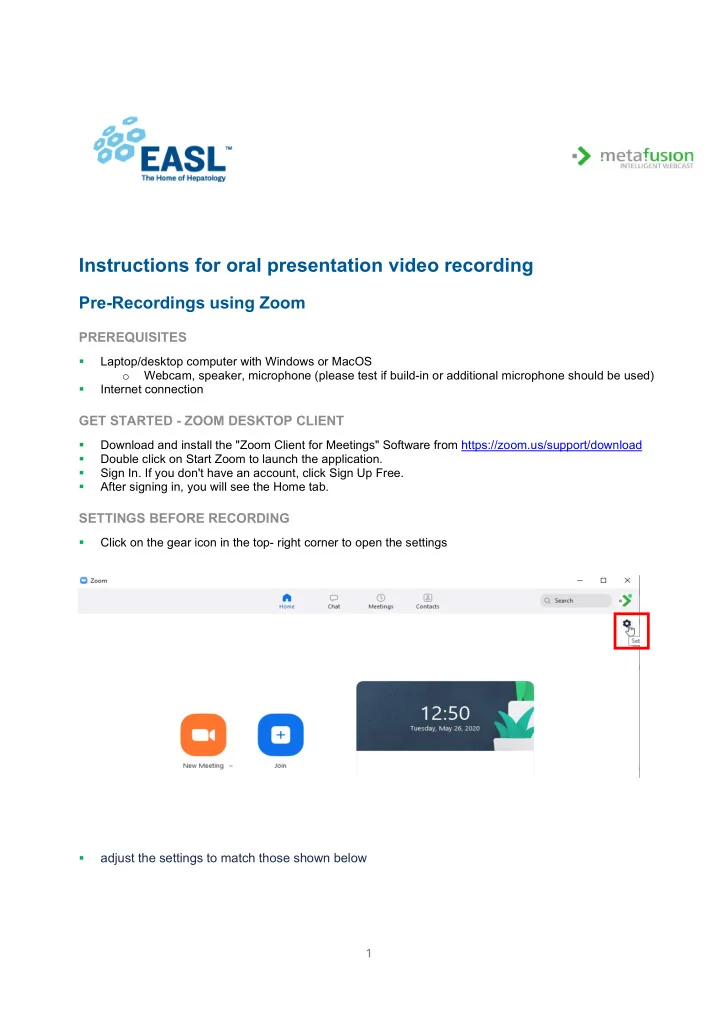

Instructions for oral presentation video recording Pre-Recordings using Zoom PREREQUISITES Laptop/desktop computer with Windows or MacOS o Webcam, speaker, microphone (please test if build-in or additional microphone should be used) Internet connection GET STARTED - ZOOM DESKTOP CLIENT Download and install the "Zoom Client for Meetings" Software from https://zoom.us/support/download Double click on Start Zoom to launch the application. Sign In. If you don't have an account, click Sign Up Free. After signing in, you will see the Home tab. SETTINGS BEFORE RECORDING Click on the gear icon in the top- right corner to open the settings adjust the settings to match those shown below 1
Video: o Camera: Select the camera; Select “16:9 widescreen“ o My Video: Select „ Enable HD“ Audio: o Set your microphone and speaker, test them, and adjust their volume 2
Recording: o Verify the location for your local recordings and change it if necessary o Select "Optimize for 3rd party video editor" o Select "Record video during screen sharing" o Select "Place video next to the shared screen in the recording" Close the settings window PREPARE RECORDING: Close all applications except Zoom and your presentation application (Powerpoint...) In the Zoom Client, start a new meeting from the Home tab Click Share Screen in the meeting controls. Select your presentation app window (Blue Border indicates selection), select the " Share computer sound " checkbox and click the "Share" button on the right. 3
Important: please maximize the window of your video (webcam) by dragging the edge of the window as wide as possible. Note: This setting has a direct impact on the recorded video layout and absolutely must be executed. Switch the presentation software (e.g. PowerPoint) into slide show / presentation mode. 4
Arrange your two windows (speaker & presentation) so that you can hold your presentation - please make sure that the speaker picture remains open and maximized * 1 , * 2 START RECORDING: If you're all set up and ready (camera position/background/lighting ok?), start the recording in Zoom at the top of the screen (meeting control → M ore → Record) Hold your presentation. Once you finished your presentation, simply leave the Zoom meeting by closing the Zoom Meeting Window . The recording stops automatically. After the meeting has ended, Zoom will convert the recording so you can access the files. If you have troubles finding your recorded video file please return to the Zoom Home tab, select meetings and your recorded files on the left. 1 if the speaker video window interferes with your presentation, we recommend connecting a second monitor 2 the arrangement of your windows has no influence on the recorded 2in1-file, but make sure the speaker video window is always maximized 5
Locate the .mp4 file (e.g. zoom_0.mp4) of the recording and open it. o Is both the small camera video on the right and big presentation video on the left visible? o Can you hear yourself talking? o Do you like the video? Were there any mistakes? If you are fine with the recording, please open the link provided to you and upload the mp4 file on the server of EASL provider for the event, meta-fusion. 6
Recommend
More recommend