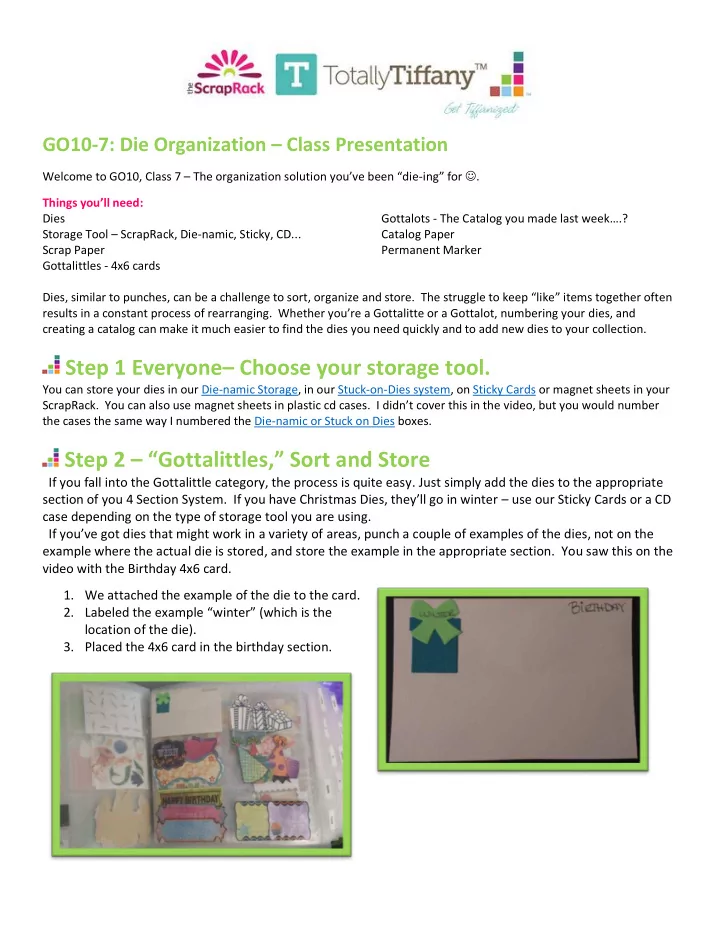

GO10-7: Die Organization – Class Presentation Welcome to GO10, Class 7 – The o rganization solution you’ve been “die - ing” for . Things you’ll need: Dies Gottalots - The Catalog you made last week….? Storage Tool – ScrapRack, Die-namic, Sticky, CD... Catalog Paper Scrap Paper Permanent Marker Gottalittles - 4x6 cards Dies, similar to punches, can be a challenge to sort, organize and store. The struggle to keep “like” items together oft en results in a constant process of rearranging. Whether you’re a Gottalitte or a Gottalot, numbering your dies, and creating a catalog can make it much easier to find the dies you need quickly and to add new dies to your collection. Step 1 Everyone – Choose your storage tool. You can store your dies in our Die-namic Storage, in our Stuck-on-Dies system, on Sticky Cards or magnet sheets in your Scrap Rack. You can also use magnet sheets in plastic cd cases. I didn’t cover this in the video, but you would number the cases the same way I numbered the Die-namic or Stuck on Dies boxes. Step 2 – “ Gottalittles, ” Sort and Store If you fall into the Gottalittle category, the process is quite easy. Just simply add the dies to the appropriate section of you 4 Section System. If you have Christmas Dies, they’ll go in winter – use our Sticky Cards or a CD case depending on the type of storage tool you are using. If you’ve got dies that might work in a variety of areas, punch a couple of examples of the dies, not on the example where the actual die is stored, and store the example in the appropriate section. You saw this on the video with the Birthday 4x6 card. 1. We attached the example of the die to the card. 2. Labeled the example “winter” (which is the location of the die). 3. Placed the 4x6 card in the birthday section.
Step 2 – Gottalots - Cut, Add to your catalog, Number and Store. This is as simple as it sounds. Gather your dies. Cut examples . Add the examples to your catalog.
Place the dies in your storage tool – Scraprack, Die- Namic, Stuck on Dies, CD case…etc. - Number the tool. Give the catalog example the same number. Step 3 – Start small – finish, and begin again. As we recommend every week. Work in small batches of die s. You’ll be amazed at how much you can get done in just a few minutes each day. When you work through a task from start to finish, you’re more likely follow through the next time.
Tips: If you’re cutting “nesting” dies. Cut them in two different colors so each size is easily visible. Throw away dies that don’t work! When setting your dies on the table place the cutting side down, they’ll be easier to pick up. Cut multiples of dies that can be used in multiple categories. For Gottalittles – Store Dies and Stamps that go together in the same place. Step 4 – Move your Dies into your Organized Only Space!! Each week we’ve added a little more to our Organized Only Space. It’s filling up nicely. Everything is visible and accessible. Hopefully you’ll find a little time to craft over the next week. I’m sure you’ll find the work you’ve done will make crafting even more fun! Step 5 – Watch for your next GO-10 Email! Thanks for participating in Go-10. Remember if you want to connect with other Go-10 or Get Organized Challenge participants, you can join them on FB by searching: 2011GetOrganizedChallenge Group – Or just click here.
Recommend
More recommend