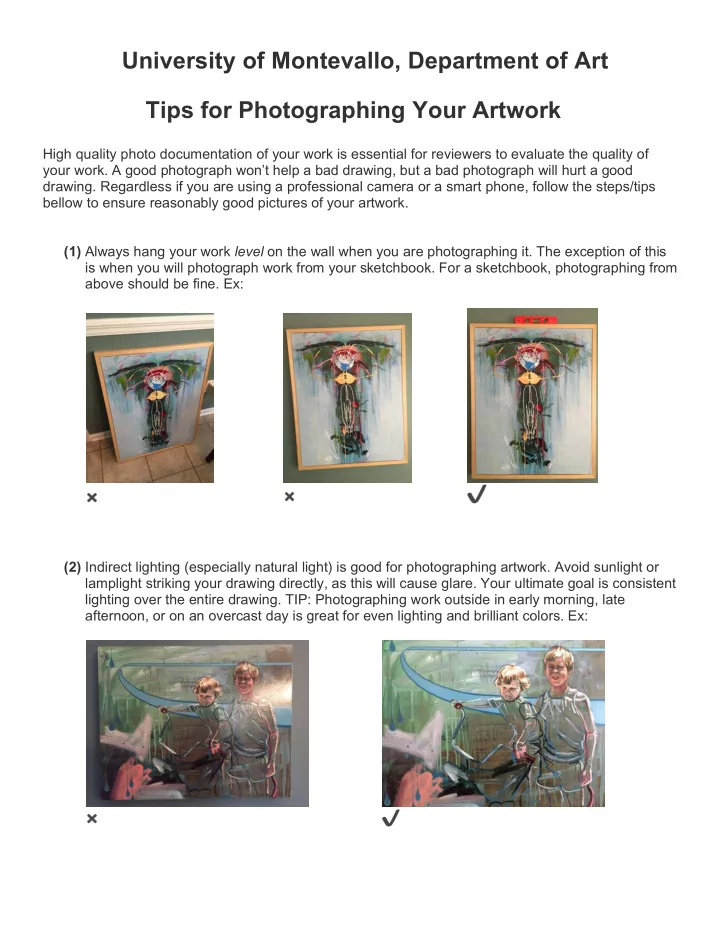

University of Montevallo, Department of Art Tips for Photographing Your Artwork High quality photo documentation of your work is essential for reviewers to evaluate the quality of your work. A good photograph won’t help a bad drawing, but a bad photograph will hurt a good drawing. Regardless if you are using a professional camera or a smart phone, follow the steps/tips bellow to ensure reasonably good pictures of your artwork. (1) Always hang your work level on the wall when you are photographing it. The exception of this is when you will photograph work from your sketchbook. For a sketchbook, photographing from above should be fine. Ex: ✔ ✖ ✖ (2) Indirect lighting (especially natural light) is good for photographing artwork. Avoid sunlight or lamplight striking your drawing directly, as this will cause glare. Your ultimate goal is consistent lighting over the entire drawing. TIP: Photographing work outside in early morning, late afternoon, or on an overcast day is great for even lighting and brilliant colors. Ex: ✔ ✖
(3) Make sure you are photographing your art straight on and level . Avoid your camera’s viewfinder tilting up, down, or sideways, as it will cause distortions or skewing. Ex: ✔ ✖ (4) Get close enough to your drawing to show detail and to crop out background information. ✔ ✖ (5) Turn off the flash. This will create glares and will wash out your drawing. ✔ no flash ✖ with flash
(6) Make sure your photo is in focus. If you don’t have a tripod, try holding your breath and keeping your hands steady. Take many photos until you have one that is crisp and clear as even the slightest blur with hinder the readability of your drawing. ✔ (yes, this is my daughter’s painting) ✖ Slide example (with label) for a PowerPoint or PDF portfolio: Save PDF or PowerPoint file with your first and last name.
Recommend
More recommend