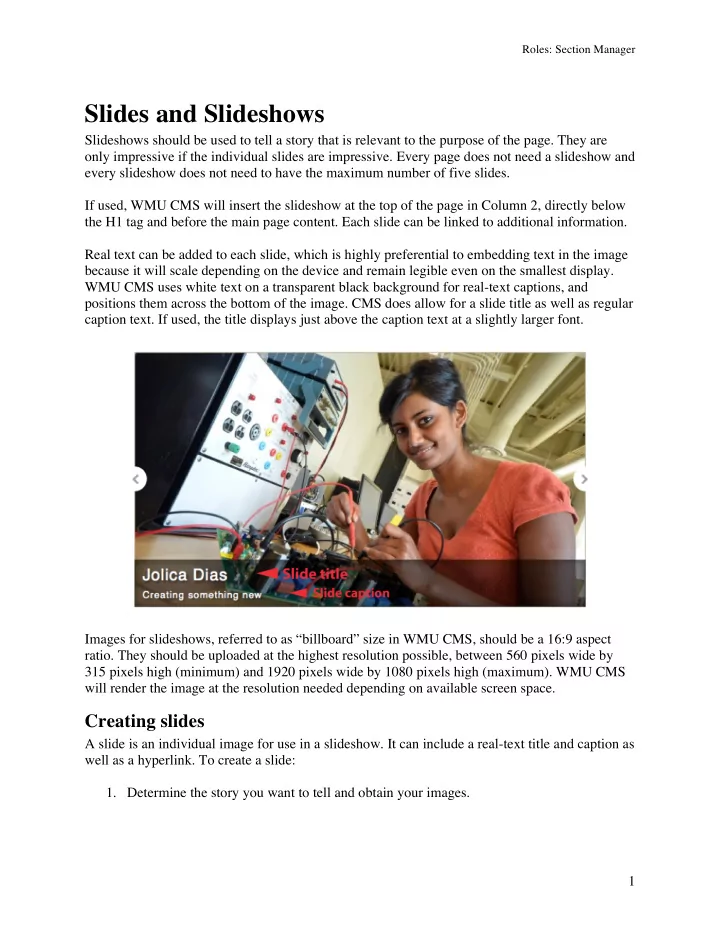

Roles: Section Manager Slides and Slideshows Slideshows should be used to tell a story that is relevant to the purpose of the page. They are only impressive if the individual slides are impressive. Every page does not need a slideshow and every slideshow does not need to have the maximum number of five slides. If used, WMU CMS will insert the slideshow at the top of the page in Column 2, directly below the H1 tag and before the main page content. Each slide can be linked to additional information. Real text can be added to each slide, which is highly preferential to embedding text in the image because it will scale depending on the device and remain legible even on the smallest display. WMU CMS uses white text on a transparent black background for real-text captions, and positions them across the bottom of the image. CMS does allow for a slide title as well as regular caption text. If used, the title displays just above the caption text at a slightly larger font. Images for slideshows, referred to as “billboard” size in WMU CMS, should be a 16:9 aspect ratio. They should be uploaded at the highest resolution possible, between 560 pixels wide by 315 pixels high (minimum) and 1920 pixels wide by 1080 pixels high (maximum). WMU CMS will render the image at the resolution needed depending on available screen space. Creating slides A slide is an individual image for use in a slideshow. It can include a real-text title and caption as well as a hyperlink. To create a slide: 1. Determine the story you want to tell and obtain your images. 1
Roles: Section Manager 2. Color correct and crop to a 16:9 aspect ratio. Final images should be between 560 x 315 pixels (minimum) and 1920 x 1080 pixels (maximum). For details on color correcting and cropping images, see the Image Preparation portion of the WMU CMS manual. 3. Log in to WMU CMS. 4. Click Add content and select Slide . 5. Enter a Title . This will be displayed in the Dashboard and will be used to add the slide to a slideshow. If you choose to, you can also include this title in the real-text caption. It will display above the caption in a larger font. 6. Choose your Section if you have more than one. 7. Choose an image file and click Upload . 8. Enter Alternate text . Alternate text is required for all images and will be used by screen readers, search engines, or when the image cannot be loaded. It should describe the image. Example: “Photo of WMU students at Bronco Bash.” 9. Enter a Title if desired. This is a tool tip that is seen when the user hovers the mouse over the image. 10. Enter a Link if this picture will link to additional information (optional). This is the URL that will be visited when a user clicks the image. If the link resides on WMU's main wmich.edu Web server, enter a relative path (do not enter http://www.wmich.edu/, but enter everything following). You do not need to enter a trailing slash. Example: http://www.wmich.edu/sample/about/facts/ should be entered as: sample/about/facts. For all other pages, including wmich.edu subdomains, enter the full URL. Example: http://gowmu.wmich.edu. 11. Include title in caption (optional) by checking this box. If selected, the Slide Title will appear as the first line of the caption in large font, followed by the Caption text in smaller font. 12. Enter a Caption , if desired. The caption will display in white text on a transparent black background across the bottom of the image. 13. Click Save . 14. Repeat the above procedure for up to four more slides. 2
Roles: Section Manager Creating a slideshow A slideshow is a rotating sequence of images that can be placed at the top of the page, directly below the H1 tag and before the main page content. To create a slideshow: 1. Log in to WMU CMS 2. Using the instructions above, create up to five slides for use in the slideshow. 3. Click Add content and select Slideshow . 4. Enter a Title . 5. Choose your Section if you have more than one. 6. Enter the titles of the Slides you just created. 7. Enter the title of the page you wish the slideshow to Show on . The slideshow will only appear on the pages you select here. Selected pages must be in the same section as the slideshow. If this field is left blank, the slideshow will not appear on the site. 8. Click Save . 3
Recommend
More recommend