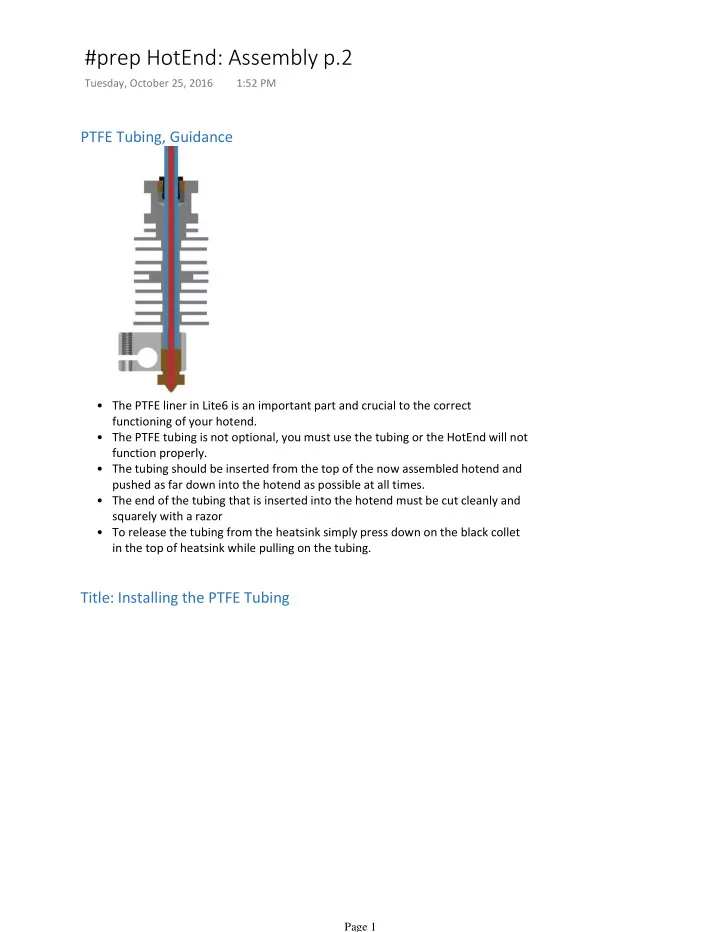

#prep HotEnd: Assembly p.2 Tuesday, October 25, 2016 1:52 PM PTFE Tubing, Guidance • The PTFE liner in Lite6 is an important part and crucial to the correct functioning of your hotend. • The PTFE tubing is not optional, you must use the tubing or the HotEnd will not function properly. • The tubing should be inserted from the top of the now assembled hotend and pushed as far down into the hotend as possible at all times. • The end of the tubing that is inserted into the hotend must be cut cleanly and squarely with a razor • To release the tubing from the heatsink simply press down on the black collet in the top of heatsink while pulling on the tubing. Title: Installing the PTFE Tubing Page 1
Title: Installing the PTFE Tubing Slide the PTFE tube into the heatsink. Then, push it back up (as much as the black collet on top rises) so that about 2mm of the tubing ends up sticking out of the threaded end. Page 2
The PTFE guides the filament from the cold side of the heatsink right down into the hot nozzle. For it to do so effectively it must butt up against the nozzle squarely and be positively secured in that position. Cut the PTFE squarely against the stainless heatsink with a razor blade, x-acto knife, or other very sharp cutting instrument. Title: Heatsink Page 3
Unscrew the nozzle about 1/4 to 1/2 of a turn (90 to 180 degrees) to create a small gap between the nozzle and the heatblock. Page 4
Screw in the heatsink all the way to touch the nozzle. Bend the red heat cartridge wires at a 90 degree angle straight back (see picture). The wires will sit between the heatblock and the heatsink. Slightly tighten the nozzle against the heatsink with your IMADE3D Wrench, 7mm wrench, or spanner. Only use light force now - to keep the assembly from falling apart and shifting. (The IMADE3D Wrench in the picture is old old prototype. Yours is nicer.) Page 5
Angle the wires to exit at a nice 90 degree angle and bundle the with a 4'' zip ties. Make sure to give the thermistor wires some slack: no pulling! When you're at it, shrink the leftover heatshrink at an appropriate place. CheckPoint: State of the HotEnd CheckPoint: HotEnd Page 6
The PTFE should be sticking out on the top and not moving in any direction. The black collet should be all the way up. None of the heatshrink should ever touch the heatblock. Only the fiberglass sleeving can withstand printing temperatures. Page 7
There should still be a small gap between the nozzle and the heatblock. The gap can be smaller than the one in the picture, but some gap must be there. Next Step: Hot Tightening We will do this a bit later , once we put together the electronics and test our power supply! For now, you're done! (The red insulating sock will also go on later.) If you're building a hotend from scratch and already have some JellyBOX built, then go ahead and go to HotEnd: Hot-Tightening Guide Hot tightening is essential to sealing the nozzle and heatsink together to ensure that molten plastic cannot leak out of the hotend in use. When done properly there is almost zero chance of leaks. Essentially, we heat up the hotend to 240C and tighten the nozzle. When at lower temperatures the aluminum will contract and lock the nozzle and heatsink together extremely securely. Page 8
Page 9
Recommend
More recommend