Airframe Life Extension by Optimised Shape Reworking Overview of - PowerPoint PPT Presentation
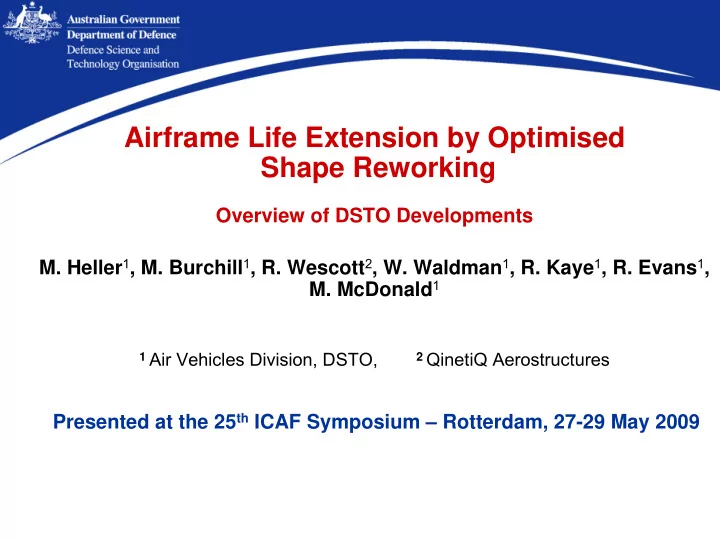
Airframe Life Extension by Optimised Shape Reworking Overview of DSTO Developments M. Heller 1 , M. Burchill 1 , R. Wescott 2 , W. Waldman 1 , R. Kaye 1 , R. Evans 1 , M. McDonald 1 1 Air Vehicles Division, DSTO, 2 QinetiQ Aerostructures Presented
Airframe Life Extension by Optimised Shape Reworking Overview of DSTO Developments M. Heller 1 , M. Burchill 1 , R. Wescott 2 , W. Waldman 1 , R. Kaye 1 , R. Evans 1 , M. McDonald 1 1 Air Vehicles Division, DSTO, 2 QinetiQ Aerostructures Presented at the 25 th ICAF Symposium – Rotterdam, 27-29 May 2009
Context – Airframe life extension • Airframes contain many stress raising features • Most shapes consist of straight lines & circular arcs • Traditional shapes have localized peak stresses • Cracking at only a few locations can define the economic fatigue life for an aircraft structure • Hence reducing stresses at a few locations can provide significant benefits to the RAAF - safety, aircraft availability, cost saving
Context – Standard blend repairs � Very common approach for removal of damage Applied to flat or curved surfaces � local radius, R � May extend fatigue life repair radius, r depth, d Stresses higher than original shape �
Concept of optimal reworking • Optimal shape removes the damaged material and minimises stresses • For many practical problems there are no analytical solutions Crack Blueprint geometry Traditional rework Optimised rework Initial shape Traditional re-shape Optimal re-shape (free-form) (limited benefit) (lowest stress)
Outline � Context / concept � Numerical approach � F-111 WPF application & lessons learned � Fatigue life trends � Other design studies / applications � Transitioning issues
Numerical approach Single peak stress minimisation σ th ∆σ = |σ i | − σ th Hoop stress ⎛ σ − σ ⎞ ⎜ ⎟ = i th d sc ⎜ ⎟ σ i ⎝ ⎠ th σ = σ max 1 i n th i Node position on boundary • Aim is constant local stress • Iterative FE method based on biological growth • Net material removal only • Remeshing algorithms used – DSTO code
Numerical approach 2D multi-peak stress minimisation S 2 S 2 2:1 elliptical hole 2:1 optimal rework • 21% stress reduction compared to elliptical hole • 43% stress reduction compared to circular hole
Numerical approach 3D multi-peak stress minimisation j=v : j=2 j=1 i - 1 i i+1 2:1 aspect ratio Remote stresses, S 2 = -S 1 /4 • 14 % stress reduction compared to elliptical hole
F-111 wing pivot fitting application holes runouts Requirement: • Improve shapes for fatigue prone holes and runouts • Achieving PWD & extend inspection intervals
F-111 WPF application Stiffener runouts Rework shape Typical SRO after machining � 30-40% reduction in peak stress � 4 unique optimal shapes for 4 different locations � buckling strength considered
F-111 WPF application Fuel flow vent holes � 25 - 50 % stress reductions � 4 unique optimal shapes for 4 different locations
F-111 WPF application Manufacturing rework shapes � Electrical discharge machining � Worked - but complex with difficult access Electrode Plate Locating Finishing Roughing Probe Electrode Electrode
F-111 WPF application Experimental validation Static tests Fatigue tests 8000 4000 0 - durability Strain ( µε ) -4000 - damage tolerance -8000 -12000 FE (optimal) Test (optimal) FE (blueprint) -16000 Prior test (baseline) -20000 0 30 60 90 120 150 180 210 240 270 300 330 360 Angle about Hole (Degrees)
F-111 WPF application Lessons Reshaped holes Requirements: 1. Account for variations in fleet nominal geometry 2. Increased understanding re interaction of: • Hole size & aspect ratio • Manufacturing constraints • NDI constraints Reshaped SRO • Fatigue lifing philosophy 3. Need simpler in-situ manufacturing methods
Fatigue life trends Safe life approach Shape optimisation increases life by reducing stress concentration 14 12 t 2 A= -0.2 t 1 10 A= -0.227, F18 APOL A= -0.314, AP-3C 8 t t2 / t t1 A= -0.4 Non-optimal Kt 1 Kt 6 4 Optimal Kt 2 2 Flight time, t (hours) 0 0.6 0.7 0.8 0.9 1.0 K t2 / K t1 1 / A ⎛ ⎞ ln( σ ) = ( ) + K Α ln t Β t K ⎜ ⎟ t2 = t2 t t ⎜ ⎟ t K ⎝ ⎠ t1 t1
Fatigue life trends Crack growth / SBI Baseline is initial circular hole, r = 20mm σ r 3.5 y K t 3.0 3.0 2.5 2.0 Beta factor 2.5 σ y 1.5 2.0 a / 1.5 1.0 0 5 10 15 20 σ r a (mm) β = σ y σ where 1 . 12 ( / ) remote
Fatigue life trends Crack growth / SBI 15000 Assume through crack � K t 3.0 � Use “effective block” approach 2.5 Residual life (hrs) 10000 2.0 1.5 � F/A-18 spectrum 5000 a f ∫ = m Life 1 /[ C ( K ) ] da 0 ref 0.01 0.1 1 10 100 a a i (mm) i = σ σ σ π where K ref 1 . 12 ( / ) a y remote ref Reduced rate of crack growth – typically gives longer inspection intervals
Simplified in-situ manufacturing method Non-circular hole in steel stiffener – F-111 FFVH test case � Precise templates in conjunction with air-powered tooling � Two main steps: 1. Coarse sanding drum, 2. Fine abrasive drum, followed by polishing
Simplified in-situ manufacturing method Non-circular hole in steel stiffener coupon wing pivot fitting
Simplified in-situ manufacturing method Non-circular hole in closely spaced al. alloy stiffeners � For difficult to access locations � Two main steps: 1. Carbide burr cutting tool, 2. Diamond coated abrasive tool, followed by polishing
Simplified in-situ manufacturing method Oversized circular hole in closely spaced al. alloy stiffeners � Oversized circular hole � Height above skin of 0.01 ″
Simplified in-situ manufacturing method Non-circular runout in steel stiffener
Improved NC machining: F-WELD example Code for smoothing of raw FEA co-ordinates � � Shape has many circular arcs � radius of curvature shown 2.0 2.0 1.8 1.8 Normalised radius of curvature Normalised radius of curvature 1.6 1.6 1.4 1.4 1.2 1.2 1.0 1.0 0.8 0.8 0.6 0.6 0.4 0.4 0.2 0.2 0.0 0.0 0 15 30 45 60 75 90 0 15 30 45 60 75 90 Angle about hole, (degrees) Angle about hole, π (degrees) before after
Robustness for optimised shapes 3 σ mis Standard optimal Peak Stress σ nom θ 2 σ nom σ mis Robust optimal 1 -10 - 8 - 6 - 4 - 2 0 2 4 6 8 10 Load inclination angle, θ • Robust optimal has constant and minimised peak stress over expected 10 degree load misalignment range • For variation of load orientations or multiple load cases
Other design studies & applications 1. Generic optimal solutions for loaded plates with: • Single holes • Interacting holes • Edge notch coupons • Surface damage removal (3D) • Shoulder fillets • Crack stop holes
Other design studies & applications 2. Applications / demonstrators with optimal reworks: 1. F-111: four fuel flow vent holes in WPF FEA, full scale tests, fleet 2. F-111: four stiffener runouts in WPF FEA, full scale tests, fleet 3. F-111: fuel pilot valve hole in upper skin FEA, full scale tests 4. F-111: gravity refuel hole in upper skin FEA, full scale tests 5. F-111 wing pivot fitting bush FEA, full scale tests 6. F/A-18: aileron hinge FEA, static tests 7. F-111 revised FFVH, SRO FEA, manuf. demo 8. AP-3C: fuel flow hole in stiffener FEA, manuf. demo 9. B707: surface damage removal FEA, manuf. demo 10. F/A-18: vertical tail stub attachment FEA, manuf. demo 11. PC9/A: lower wing skin at up-lock FEA 12. F/A-18: FS 470 bulkhead FEA 13. F-35: bulkhead access holes test case FEA 14. Other low kt coupon design Fatigue tests, pending
Design study Generic interacting optimal holes θ r (loading S 1 =S 2 ) 4.0 e h Circular holes w Stress concentration factor, K t Optimal holes 3.5 S 2 3.0 4 3 2.5 2 S 1 S 1 2.0 1 y/h 0 1.5 -1 0.0 0.5 1.0 1.5 2.0 2.5 -2 e/h = 4.92 Minimum edge separation distance, e/h Analytical solution from -3 Cherepanov (1974) with - no interaction effects after optimisation corrections by Vigdergauz (1976) -4 -3 -2 -1 0 1 2 3 - optimal shapes approach half-circle as x/h S 2 e/h approaches zero
Practical application example F-111 WPF bush fillet redesign nominal • used on F-WELD fatigue test • 30% stress reduction redesign • Test life 12000 hrs, versus fleet replacement at least every 1025.
Design study Robust hole in a shear panel (a) 99 Ksi 31% reduction in peak stress (b)
Transitioning issues Repair if re-crack occurs at optimal 60 Options: Inner Optimal 1. A family of morphed shapes, 20 Middle Optimal -120 120 Outer optimal - negligible increase in peak -20 50 % Morphed shape stress -60 -100 -140 2. A local circular arc blend local optimal radius, R - small increase in in peak stress repair radius, r depth, d - partial or full thickness
Acknowledgements � RAAF ASI – DGTA (Sponsorship) � Staff working on F-111 Sole operator program, including F-WELD � Other DSTO staff � RAAF Amberley � Industry - Boeing, TAE, Amiga Eng., QinetiQ AeroStructures:
Conclusions Rework shape optimisation a useful approach for life extension � � Shapes either: - Generic (symmetric) - One off optimal shapes � Key technical impediments overcome DSTO keen to transition approach more widely � � Approach applicable to initial design
Recommend
More recommend
Explore More Topics
Stay informed with curated content and fresh updates.

