Welcome to Form Simplicity Training Basic use Log-in to Form - PowerPoint PPT Presentation
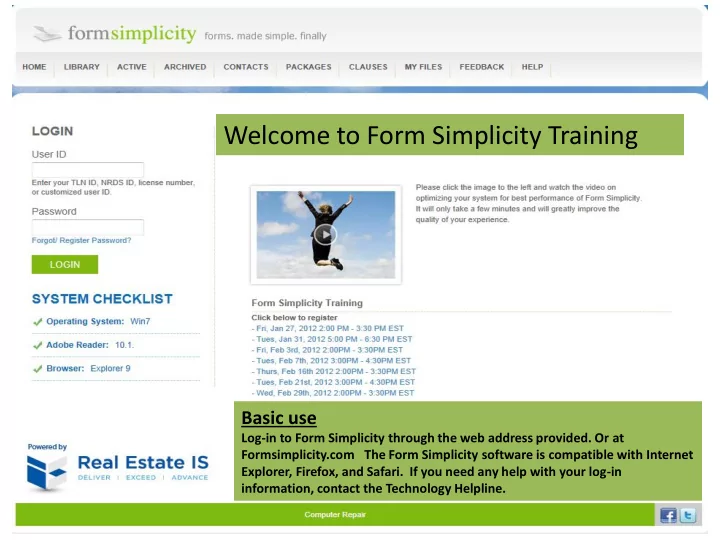
Welcome to Form Simplicity Training Basic use Log-in to Form Simplicity through the web address provided. Or at Formsimplicity.com The Form Simplicity software is compatible with Internet Explorer, Firefox, and Safari. If you need any help
Welcome to Form Simplicity Training Basic use Log-in to Form Simplicity through the web address provided. Or at Formsimplicity.com The Form Simplicity software is compatible with Internet Explorer, Firefox, and Safari. If you need any help with your log-in information, contact the Technology Helpline.
Login and System Check List • Login Same as NRDS for MLS • System Requirements – Operating System requirement – Adobe Reader Version – Browser Version • All Green Checks? – Good to Go!
Type in your ID 1 and Password 2 3 Notice the system checklist
The Home Page • Version of Form Simplicity you currently have • Tool Bar • Quick Access links
Let’s start by going into the Forms Library
Meeting 3 Business Needs • Basic Use – Print, Fill and Go • Automation – Create transactions and automate content • Archiving – Long term storage of all documentation
‘PRINT AND GO’ Start on Home Screen Click “LIBRARY or START A FORM” Check the box next to form/s Click the Select Command drop down Print button – you can print all pages, or just a select few. How fast was that??
Automation • Create transactions from pre loaded packages (brokerage) • Adding Forms to transaction • Uploading documents to transaction • Difference between files and forms
‘AUTOMATION’ 1 Home ( Go to home screen) Note… Pretend I’m your agent. You, as the broker, have already gone in and created a Purchase Offer package for me to use. All I have to do now is … Open ‘ Packages ’ Check ‘ Purchase Package ’ Click ‘CREATE TRANSACTION FROM 3 SELECTED ‘PACKAGE ’ Name it – ‘Speedy Ln’ – SAVE 2
And here’s the transaction that I created from my “ B roker Package” complete with forms, files and pre- filled info such as the brokerage name. From this point I can import MLS info, (If applicable) fill out the content tab, then either fax or email the forms and files to my client (If Applicable) – Open ‘ Select Command ’ drop down menu. It’s that simple.
Starting a Transaction • Tabs within Transaction Content History Tasks
1 CONTENT TAB (If APPLICABLE) From this tab you can manually type in information or IMPORT FROM ALMOST ANY MLS !! Let me show you how! 2 Type your MLS Listing ID # (RE12345) Click ‘ IMPORT MLS ’ Verify the correct listing appears and 3 click ‘ SELECT ’ WOW!! All of the listing information is automatically filled in! ** Instructor: Scroll down to Seller Name ** Synchronization : Changes made on You Can fill in the data on the content sheet! the forms are reflected on the Content page and vice versa. Oops !! I just noticed that I spelled the seller’s name incorrectly. Let me correct that: Change Seller Name to: Sallie P. 5 Seller Click ‘ SAVE CHANGES ’ 6 Now I have to go into each form and Change Name change the Seller’s name. No! I don’t! I can change it here or on any of the forms in my transaction and it 7 changes it on everything !
HISTORY TAB From the history tab you can view the entire history of a “ Transaction” From the History Tab you can also access the e-sign session statues. Click on the option that you want for the e-sign history. You can check the statues of a session. You can also copy a session and if the session has not been signed by anyone you can cancel the session.
Customizing Your Packages • Create your personal packages – Why you would want them – What to put in them – Ways to access your transactions and packages
CREATING A NEW FORMS PACKAGE 1 Click ‘PACKAGES’ Create ‘ NEW FORM PACKAGE ’: Name it - Listing Click on the name to open 2 Add forms – ‘ ADD FORMS TO FORM PACKAGE ’ This brings up our Blank Form Library underneath our Package. The Library can 3 include State forms Local Board forms and Brokerage forms 4 There are a number of ways to find forms: Sort Search I’m going to use the SEARCH to find my Listing Agreement ( Type: Listing ) SELECT: Listing Agreement (1 st form) Click ‘ ADD TO FORM PACKAGE ’ Now I want the Seller’s Disclosure form, 5 so I’ll use SORT to reverse the alphabetical order under TITLE SELECT: Seller’s Disclosure Click ‘ ADD TO FORM PACKAGE ’ 6 But wait! We can add all types of FILES in this section too: Pics, docs, property flyers, spreadsheets, PDFs… 7
And in this case, I’ve created a spreadsheet I use for my Listing Checklist. Let’s upload that FILE : Click ‘ UPLOAD FILE ’ Click ‘ CHOOSE FILE ’ and find the file on 1 your computer I want the “ Listing Checklist ” You can enter in a description of the file if you wish 2 Click ‘ UPLOAD ’ That’s it! Now our Listing Checklist is in our Package too! 3 Now that we have our forms and files in our Package, let’s PRE-FILL some of the data: 4 Open “ LISTING FORM ” type ‘ Brokerage Name ’ Fill in any info that will not change on that form. Click Save & Close Click HOME Now I’m going to show you how fast & professional this program will make you look!! Our Transactions screen is revolutionary and has already been copied by others in the marketplace. Let me show you how to create a new Transaction from the Package we just created…. Any QUESTIONS?
CREATING A NEW TRANSACTION FROM OUR FORMS PACKAGE 1 Click on ‘ PACKAGES ’ Check the circle next to “ LISTING ” Click on “ CREATE TRANSACTION FROM SELECTED PACKAGE” Name it: Simple St Click “ Save ”…....... AND LOOK!!! All 3 of your Forms & Files are there!! Now OPEN: “ Listing Form ” 4 Your pre-Filled info is there TYPE in your seller’s name : Sally Seller 2 Save & Close 5 6
Click Back to ‘Simple St ’ Tab 1 OPEN: Listing Form SHOW: Synchronization (name) Info from Package transferred over MLS Auto-pop Open Form 2 We just discovered this is a short sale, which means we need to add an Addendum. Click on ‘ ADD FORM TO TRANSACTION ’ Choose the “ Short Sale Addendum” Pick the “Simple St.” transaction and click ‘ SAVE ’ SHOW by opening new form: Info auto- popped just by adding it to the Transaction ‘ SAVE AND CLOSE’ Remember, we can also add files to our transaction. In this case, we want to upload a property photo. 3 Click ‘ UPLOAD FILE’ Simple Street PIC UPLOAD 5 Now we have not only forms, but also files and pictures we can access any time, from any computer with an internet connection. 6 Any QUESTIONS? 4
What you can do now • Keep all forms, correspondence, files etc. in one tidy place • Fax files and forms to interested parties • Email forms and files to interested parties • eSigning Documents • Broker Submittal process
2 SENDING TO CLIENT Email: 1 Pick the forms and files you would 3 like to send to your client On the “ SELECT COMMAND ” drop - down menu, click ‘ EMAIL ” If they are already entered as a 1 contact, click on the ‘+’ symbol and select their e-mail address If they are not a contact, simply type in their e-mail address and click 6 “EMAIL” Notice that if they are not a contact a 4 screen will automatically pop up 7 asking you if you would like to add them as a new contact! Wow! 8 Fax: (If Applicable) Faxes with a fax-back coversheet Same as with e-mail: if they are a contact, click on the ‘+’ symbol and select their fax #, if they are not, the system will prompt you to add them 10 5 Click “ FAX ” and you’re done! Cancel Back to ‘ ACTIVE ’ Transactions Any QUESTIONS?
Submitting Transactions using 1 ‘Broker Submittals’ If your Broker has activated the ‘Broker Submittals ’ tab, you can directly submit your transactions to your Broker for 2 approval within Form Simplicity. Select 1. Click on ‘Active Transactions’ Transaction 2. Click on the name of the transaction you would like to submit 3 4 3. Click on the tab labeled ‘Broker Submittals ’ 4. Click ‘ CREATE SUBMITTAL’ 5. Name the submittal (if no name entered will default to the name of the transaction), and choose the appropriate 5 submittal type from the drop‐down list ( i.e. Listing, Purchase, etc.) 6. Click on create of the submittal you have just created 6
BROKER SUBMITTAL CONT. 7. Review the checklist created by your 8 Broker 8. Add the appropriate files from your transaction by clicking on the ‘ADD FILE ’ button. Hint: the files you upload should correspond to the checklist items 9. Check off the items on the checklist 10 9 that you are submitting 10. Enter the Due Date specified by your Broker (i.e. Listing Date, Closing Date, Review etc.) 11. You can send a message to your Checklist Broker by typing in the ‘ MOST RECENT from the MESSAGES ’ box and clicking ‘ ADD broker MESSAGE’ 7 12. When your submittal is complete, click ‘SUBMIT TO BROKER’ 13. Your transaction has now been sent to your Broker for approval Hint: you can check the status of your submittal by clicking on the ‘BROKER 11 SUBMITTALS ’ tab within your 12 transaction at any time Hint: you can re‐submit your transaction if necessary by following the same procedure as listed above Any QUESTIONS?
Options • Clauses – Add regularly used clauses your brokerage uses • My Files – Access your files anywhere
Recommend


More recommend
Explore More Topics
Stay informed with curated content and fresh updates.