Reliability Improvement Project Reliability Improvement Project - PowerPoint PPT Presentation
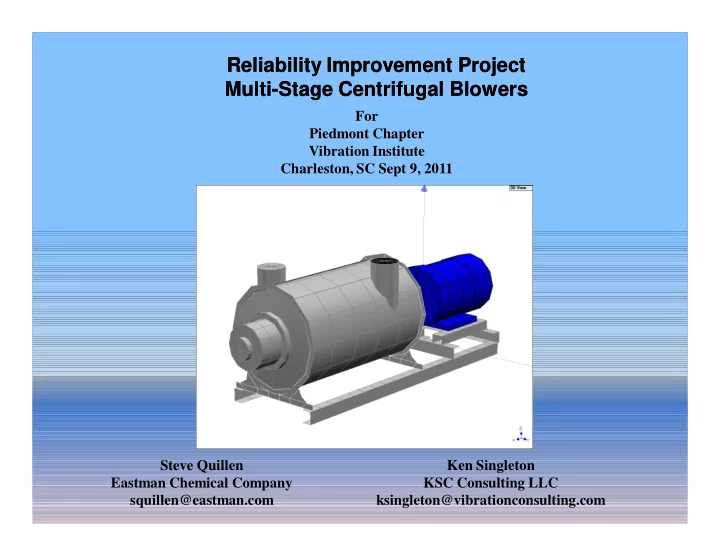
Reliability Improvement Project Reliability Improvement Project Multi Multi-Stage Centrifugal Blowers Stage Centrifugal Blowers For Piedmont Chapter Vibration Institute Charleston, SC Sept 9, 2011 Steve Quillen Ken Singleton Eastman
Periodic Vibration Analysis: Bearings in the Motors and Blowers: Motor – 6314 Ball Blower Inboard – 6313 Ball Blower Outboard – 7313 Double Row Angular Contact Ball B-71 - K-DB19 Blow er DB19 Blow e-B1P BLOWER Inboard Horz Peakvue 0.24 Route Spectrum -s G G G G G G G G G 0.20 09-Jul-08 09:38:27 in (PkVue-HP 2000 Hz) n 0.16 OVERA LL= .6889 A-DG tio RMS = .6850 ra 0.12 le LOA D = 100.0 e RPM = 3588. (59.80 Hz) c c 0.08 >SKF 6313 A S G=BPFO M 0.04 R 0 0 30 60 90 120 Frequency in kCPM 5 Route Waveform 09-Jul-08 09:38:27 4 -s (PkVue-HP 2000 Hz) G in RMS = 1.53 3 n PK(+) = 4.75 tio CRESTF= 3.11 a 2 r DCoff = 0.0 le e c c 1 A 0 Freq: 15.45 0 100 200 300 400 500 600 700 800 Ordr: 4.306 Time in mS ecs Spec: .185
Operating Deflection Shape Analysis (ODS): ODS provides a 3D Computer model of a machine or structure that can be animated at the frequencies that vibration is occurring. The vibration shape or pattern can be studied at any of the frequencies measured by the cross channel transmissibility data. Two channel analyzer required. Figure7. Wire Frame Model of a Motor, Blower and Skid With Measurement Point Locations Labeled.
ODS Models developed in ME’scopeVES V5.0 for Blowers DB 17, DB 19, and LS 10. Data acquired with CSI 2 Channel 2120. The reference accelerometer Blower OB Brg Hor. Reference accelerometer Figure7. Wire Frame Model of a Motor, Blower and Skid With Measurement Point Locations Labeled.
ODS Models developed in ME’scopeVES V5.0 for Blowers DB 17, DB 19, and LS 10. Data was measured in X, Y and Z at all locations shown that were accessible. Figure7. Wire Frame Model of a Motor, Blower and Skid With Measurement Point Locations Labeled.
ODS Models developed in ME’scopeVES V5.0 for Blowers DB 17, DB 19, and LS 10. Vibration at Points not accessible were calculated using weighted interpolation to the nearest measured points. Figure7. Wire Frame Model of a Motor, Blower and Skid With Measurement Point Locations Labeled.
ODS DB 19 Blower. Vibration at 1X. 0.098 in/sec pk 0.374 in/sec pk 0.374 in/sec pk 0.305 in/sec pk 0.305 in/sec pk 0.106 in/sec pk 0.133 in/sec pk 0.807 in/sec pk 0.807 in/sec pk 1.073 in/sec pk 1.073 in/sec pk 0.263 in/sec pk 0.426 in/sec pk 0.426 in/sec pk 1.179 in/sec pk 0.541 in/sec pk 1.179 in/sec pk 0.541 in/sec pk Figure 8. DB 19 ODS Vibration Amplitudes at 1X Run Speed Frequency.
ODS DB 19 Blower. Vibration at 2X. Blower OB Brg Housing & Skid had Highest Vibration 0.049 in/ sec pk 0.010 in/ sec pk 0.017 in/ sec pk 0.106 in/ sec pk 0.049 in/ sec pk 0.009 in/ sec pk 0.128 in/ sec pk 0.005 in/ sec pk 0.079 in/ sec pk 0.006 in/ sec pk Figure 10. DB19 ODS Vibration Amplitudes at 2X Run Speed Frequency.
ODS LS 10 Blower. Vibration at 1X. 0.103 in/sec pk 0.474 in/sec pk 0.011 in/sec pk 0.116 in/sec pk 0.103 in/sec pk 0.384 in/sec pk 0.113 in/sec pk 0.217 in/sec pk 0.586 in/sec pk 0.667 in/sec pk LS 10 ODS Vibration Amplitudes at 1X Run Speed Frequency.
ODS LS 10 Blower. Vibration at 2X. Vibration low amplitude, skid flexure shown by ODS. 0. 049 in/ sec pk 0. 019 in/ sec pk 0. 016 in/ sec pk 0. 056 in/ sec pk 0. 009 in/ sec pk 0. 143 in/ sec pk 0. 039 in/ sec pk 0. 008 in/ sec pk 0. 010 in/ sec pk LS 10 ODS Vibration Amplitudes at 2X Run Speed Frequency.
ODS DB 17 Blower. Vibration at 1X. 0.419 in/ sec pk 0. 126 in/ sec pk 0. 747 in/ sec pk 0. 246 in/ sec pk 0. 085 in/ sec pk 0. 185 in/ sec pk 0. 145 in/ sec pk 0. 143 in/ sec pk 0. 660 in/ sec pk 0. 197 in/ sec pk 0. 705 in/ sec pk DB 17 ODS Vibration Amplitudes at 1X Run Speed Frequency.
Pipe Strain: Inlet and discharge piping were connected to the blower nozzles with flexible stainless steel bellows. LS 12 Intake Nozzle: Tie bolts had been added by welding lugs to the flanges of some bellows. Bellows were completely compressed axially. Figure 11. LS 12 Blower, Compressed Bellows at Intake Nozzle.
Pipe Strain: Inlet and discharge piping were connected to the blower nozzles with flexible stainless steel bellows. LS 10 Discharge Nozzle: Tie bolts added using lugs welded to the flanges of bellows. LS 10 Blower Intake Nozzle: Bellows compressed axially. Figure 12. Blower LS 10 Blower Discharge Connection, Bellows Collapsed.
Pipe Strain: Flexible steel bellows can accommodate small amounts of axial and lateral movement. They are not designed to compensate for piping misalignment errors. LS 10 Discharge Nozzle: Tie bolts added using lugs welded to the flanges of bellows. LS 10 Blower Intake Nozzle: Bellows compressed axially. Figure 12. Blower LS 10 Blower Discharge Connection, Bellows Collapsed.
Pipe Strain: Flexible steel bellows can accommodate small amounts of axial and lateral movement. They are not designed to compensate for piping misalignment errors. Bellows compressed on one side.
Pipe Strain: Pipe guides should be installed within four diameters of the joint and then again after fourteen pipe diameters. Ref 6 The inlet and discharge piping to the blowers was not restrained so the bellows were transferring pipe movement forces to the blower nozzle flanges. Pipe Hanger Pipe Hanger Pipe Hanger Pipe thermal growth at the blowers was unrestrained. Figure 13. Piping Connected to Blowers, Blower DB 19 Shown.
DB 19 Blower Continuous Vibration Acquisition: A multi-channel spectrum analyzer, IOtech 618E & Tomas software was used to measure vibration data from accelerometers magnetically mounted on the motor and blower bearing housings. Photo shows Permalign, an accelerometer, Optical Tachometer, and the Alta-Flex coupling of DB19 Blower. Figure 14. DB 19 With Laser Alignment and Vibration Sensors Attached.
Continuous Vibration Acquisition: Accelerometers were mounted at following locations: Motor OB Hor 90 Deg Left Motor OB Ver TDC Motor IB Hor 90 Deg Left Motor IB Ver TDC Motor IB Axial 0 Deg Blower IB Hor 90 Deg Left Blower IB Ver TDC Blower OB Hor 90 Deg Left Blower OB Ver TDC Blower OB Axial 0 Deg Optical Tachometer sensing reflection tape at the coupling. Blower OB Ver Blower IB Motor IB Ver Motor OB Ver Ver Motor IB Axial
DB 19 Blower Continuous Vibration Acquisition: Trend Plots show that the Blower was Started 3 times. Vibration was about 6.0 in/sec pk Blower IB Horizontal each startup. . 1 st Startup & Shutdown 8:54 AM Accelerometer on 2 nd Shutdown 10:59 AM M otor Bumped. 2 nd Startup 9:07 AM 3 rd Startup 11:39 AM 6 in/sec pk 3 rd Shutdown 2:01 PM Figure 15. Overall Trend Vibration in/sec pk On DB 19 Blower, Channels 1 - 8.
DB 19 Blower Continuous Vibration Acquisition: Bode’ plot of blower vibration indicated a resonance near 2400 RPM. The peak shifted from 2400 (spin up) to 2161 (coastdown). Data indication of a rotor/bearing critical speed. Rotor Critical During Spin Up. Rotor Critical During Coastdown. Figure 16: Bode’ Plot of Blower IB Hor During 3 rd Startup and Coastdown. Vibration Amplitude was Very High at About 5.9 in/sec pk.
DB 19 Blower Continuous Vibration Acquisition: A call to the Blower OEM about the critical speed location – 1600 RPM. The indication of a critical speed much higher than calculated would not become clear until a rotor dynamic analysis was performed. Rotor Critical During Spin Up. Rotor Critical During Coastdown. Figure 16: Bode’ Plot of Blower IB Hor During 3 rd Startup and Coastdown. Vibration Amplitude was Very High at About 5.9 in/sec pk.
DB 19 Blower Continuous Vibration Acquisition: A rotor rub mid-span (between the bearings) due to high rotor unbalance would raise the critical speed. Rotor Critical During Spin Up. Rotor Critical During Coastdown. Figure 16: Bode’ Plot of Blower IB Hor During 3 rd Startup and Coastdown. Vibration Amplitude was Very High at About 5.9 in/sec pk.
DB 19 Blower Continuous Vibration Acquisition: Bode’ plot of Blower OB Bearing Housing Horizontal Response During 3 rd Startup (2271 RPM) & Coastdown (2161 RPM). Rotor Critical During Spin Up. Rotor Critical During Coastdown. Figure 17. Bode’ Plot of Blower OB Hor During 3 rd Startup and Coastdown. Vibration Amplitudes Were Much Lower at the OB Bearing Housing and the Critical Speeds Were Also Lower.
Modal Test of Blower & Motor Mounted on Skid: Motor & Blower Bolted to Skid for Impact Experimental Modal Test. Analyzer – CSI 2120 Two Channel, Medium Sledge Modal Hammer. Coupling Removed. Driving Point Skid Supported on 1” 4Z/4Z Cork. 1” Cork Vibration Isolation Figure 18: Blower & Skid Supported on Cork in the Maintenance Shop During Modal Test.
Modal Test of Blower & Motor Mounted on Skid: Driving Point Frequency Response Function (FRF). The FRF Displays the Damped Natural Frequencies Excited by Impacting the Motor with Modal Hammer. Driving Point 4Z/4Z (Motor IB, Vertical) Rigid Body Modes of Motor-Blower & Skid on 1” Cork. Rigid Body Modes are Bouncing/Yaw & Translation Modes of the skid on the Cork Isolation Material. Figure 20: FRF on Motor IB Bearing Housing Showing Natural Frequency Near Running Speed.
Modal Test of Blower & Motor Mounted on Skid: Driving Point Frequency Response Function (FRF). The FRF Displays the Damped Natural Frequencies Excited by Impacting the Motor with Modal Hammer. Skid 1 st Bending Driving Point 4Z/4Z Mode at 45.07 Hz (Motor IB, Vertical) = 2718 CPM. 1X Run Speed Figure 20: FRF on Motor IB Bearing Housing Showing Natural Frequency Near Running Speed.
Modal Test of Blower & Motor Mounted on Skid: The mode shape of the 2718 CPM natural frequency was bending of the skid rails in the vertical direction in the section between the motor support rails and the blower inboard feet mounting position. Skid 1 st Bending Driving Point 4Z/4Z Mode at 45.07 Hz (Motor IB, Vertical) = 2718 CPM. 1X Run Speed Figure 20: FRF on Motor IB Bearing Housing Showing Natural Frequency Near Running Speed.
Modal Test of Blower & Motor Mounted on Skid: Stiffening the Existing Skid Was Recommended by Welding Plate to the Channel (making the channel a rectangular tube) and also Adding plate Stiffeners. Intent was to Move the Motor-Support Skid Frame Bending Mode Well Above The Run Speed Frequency. Figure 21: Suggested Stiffen Of the Skid Frame Rails Based on the Modal Test Results.
Modal Test of Blower & Motor Mounted on Skid: It Turned Out that the Blower OEM Design Incorporated Stiffeners in this Area. During maintenance, the OEM Stiffeners had been Removed to Gain Access to Bolts but they had not been replaced. The equipment owner used this information to add stiffeners to their new frame design. Figure 22. Stiffeners Originally Included in the Blower Design .
Rotor Bearing Dynamic Analysis: A Model of the Blower Rotor was Developed in DyRoBeS Finite Element Based Software. Ref 3 & 4 (Rodyne & DyRoBeS) The Model Included the Dynamic Mass and Stiffness for the Blower Bearing Housings Which was Measured Using Shaft was Modeled using Dimensions Driving Point Modal from a Drawing. Analysis Measurements. Bearing Housing (Support Stiffness & Damping) K = 150,000lb f /in Damping Factor =0.35 (Q=4.5) Figure 23. Blower Rotor-Bearing-Support Model.
Rotor Bearing Dynamic Analysis: A Model of the Blower Rotor was Developed in DyRoBeS Ref 1 Finite Element Based Software. The Ball Bearing Stiffness was Calculated using DyRoBeS. Bearing Bearing K = 961,652 lb f /in K = 1,018,520 lb f /in Figure 23. Blower Rotor-Bearing-Support Model.
Rotor Bearing Dynamic Analysis: A Model of the Blower Rotor was Developed in DyRoBeS Ref 1 Finite Element Based Software. The Transverse & Polar Moment of Inertia For Each Impeller Was The Impeller Weight Was Calculated using Tools in DyRoBeS. Provided. Figure 23. Blower Rotor-Bearing-Support Model.
Rotor Bearing Dynamic Analysis: A Model of the Blower Rotor was Developed in DyRoBeS Ref 1 Finite Element Based Software. Note that the 1 st Four Impellers are Larger Diameter. Figure 23. Blower Rotor-Bearing-Support Model.
Rotor Bearing Dynamic Analysis: A Model of the Blower Rotor was Developed in DyRoBeS Ref 1 Finite Element Based Software. A Rule of Thumb For Flexible Rotor is the 10:1 Rule. The Diameter Should not be Smaller than 10% of the Bearing Span. This rotor was 20:1 Which Means it is Very Flexible. Figure 23. Blower Rotor-Bearing-Support Model.
Rotor Bearing Dynamic Analysis: The Rotor-Bearing 1 st Critical Speed Calculated to 1660 RPM The Nodal Points were Outboard of Each Bearing about 4 Inches. Very important that the nodal points of a critical are not at the bearings. If this happens, the bearings provide very little control of the rotor vibration at the critical speed. Figure 24. Rotor 1 st Mode. Nodal Points are About 4” Outside Each Bearing.
Rotor Bearing Dynamic Analysis: Potential Energy is Calculated by DyRoBeS Which is Useful to Show if the Shaft, Bearings and Support are Properly Participating in the Critical Speed. The Chart Shows that Most Potential Energy was in the Shaft. Figure 25. Potential Energy Distribution Showing Most Energy in the Shaft but the Bearings Have Very Low Participation in the Mode.
Rotor Bearing Dynamic Analysis: Dr Gunter Recommends the bearings have at Least 20% Strain Energy . The Bearings Calculated to Have Less than 1% Strain Energy Which Means the bearings will not contribute to overall system damping. The rotor will be Very Sensitive to Unbalance and Expected to Have High Vibration at the 1 st Critical. Coupling Opposite End End Bearing. Bearing. 0.95% 0.73% Figure 25. Potential Energy Distribution Showing Most Energy in the Shaft but the Bearings Have Very Low Participation in the Mode.
Rotor Bearing Dynamic Analysis: The Bearing Housing Calculated to about 12% and 9% Potential Energy. The Shaft is the Primary Component Controlling Critical Speed Response. Coupling End Bearing Housing Opposite 11.67%. End Bearing Housing 8.55%. Figure 25. Potential Energy Distribution Showing Most Energy in the Shaft but the Bearings Have Very Low Participation in the Mode.
Rotor Bearing Dynamic Analysis: The 1 st Critical is Plotted to Show how the Rotor Bows Out During Passage Through the Critical Speed. Unbalance = to ISO G 6.3 Was Placed in the Model. Coupling 10 th Stage Unbalance 0.076 Unbalance 2.872 1 st Stage oz-in oz-in Unbalance 2.203 oz-in Figure 27: Rotor Response at 1 st Critical to G 6.3 Unbalance in the 1 st and 10 th Stage Impellers. Maximum Orbit Mid-Span Calculated to About 11 mils pp.
Rotor Bearing Dynamic Analysis: The 1 st Critical is Plotted to Show how the Rotor Bows Out During Passage Through the Critical Speed. Unbalance = to ISO G 6.3 Was Placed in the Model. The Rotor Response Lags the Unbalance Location about 90 Deg at the Critical And About 180 Deg Well Above the Critical. Figure 27: Rotor Response at 1 st Critical to G 6.3 Unbalance in the 1 st and 10 th Stage Impellers. Maximum Orbit Mid-Span Calculated to About 11 mils pp.
Rotor Bearing Dynamic Analysis: The 1 st Critical is Plotted to Show how the Rotor Bows Out During Passage Through the Critical Speed. Unbalance = to ISO G 6.3 Was Placed in the Model. The Shaft Displacement Mid-Span for this Amount of Unbalance Calculated to about 11 Mils p-p. Figure 27: Rotor Response at 1 st Critical to G 6.3 Unbalance in the 1 st and 10 th Stage Impellers. Maximum Orbit Mid-Span Calculated to About 11 mils pp.
Rotor Bearing Dynamic Analysis: The 1 st Critical is Plotted to Show how the Rotor Bows Out During Passage Through the Critical Speed. Unbalance = to ISO G 6.3 Was Placed in the Model. The Unbalance Force at the Bearings was Calculated. Coupling End Bearing Unbalance Force 184 lb f Unbalance Force 157 lb f Figure 27: Rotor Response at 1 st Critical to G 6.3 Unbalance in the 1 st and 10 th Stage Impellers. Maximum Orbit Mid-Span Calculated to About 11 mils pp.
Rotor Bearing Dynamic Analysis: The Damped Unbalanced Response for the Drive End Bearing is Shown in Figure 28 in Bode’ Plot. Response from X Probe 0 Deg and Y Probe 90 Deg is Plotted for Response to ISO G 6.3 Unbalance. Damped 1 st Critical 1675 RPM. Figure 28. Bode’ Plot of Damped Unbalanced Response at the Drive End Bearing to G6.3 Unbalance in 1 st and 10 th Stage Impellers.
Rotor Bearing Dynamic Analysis: A Rub at the Packing Was Simulated by Added a Third Bearings. Different Stiffness Values were Tested to Find that 200,000 lb f Moved the 1 st Critical to About 2400 RPM – Agreeing with the Field Vibration Data. Bearing added at Packing Location Simulate Effect of Tight Packing. Figure 30. Blower Rotor Model with Bearing Added at the Packing Location to Simulate the Stiffening Effect of the Packing .
Rotor Bearing Dynamic Analysis: Based on the Vibration Analysis and Rotor Models: Tight Packing Acting as a Bearing was predicted to shift the rotor 1 st Critical to about 2400 RPM during spin up. Animation of Damped 1 st Forward Mode 2377 RPM Nodal Point Moves Further Away From Bearing. Nodal Point Moves Inboard of Bearing. Bearing added at Packing Location Simulate Effect of Tight Packing. Figure 30. Blower Rotor Model with Bearing Added at the Packing Location to Simulate the Stiffening Effect of the Packing .
Rotor Bearing Dynamic Analysis: Based on the Vibration Analysis and Rotor Models: Tight Packing Acting as a Bearing was predicted to shift the rotor 1 st Critical to about 2400 RPM during spin up. Animation of Damped 1 st Forward Mode 2377 RPM Nodal Point Moves Further Away From Bearing. Nodal Point Moves Inboard of Bearing. Figure 30. Blower Rotor Model with Bearing Added at the Packing Location to Simulate the Stiffening Effect of the Packing .
Rotor Bearing Dynamic Analysis: Packing Rub Affect on Strain Energy: Cause of High Model With Inboard Brg Vibration at Strain Packing Housing Inboard Bearing. Energy Acting as a Strain Decreases 200,000 lb f /in Energy in Shaft Bearing. Increases Strain 78% to 48% 11.67% to Energy at 30% Packing 14.6% Model With Packing Not Acting as a Bearing.
Blower DB 19 3 rd Startup – Frequency Spectra This sequence of spectra at the blower inboard bearing housing horizontal show the rub-affect 1 st critical speed moving higher in frequency. At rotor speed of 1601 RPM, the rotor rub affected 1 st critical has shifted up to 2025 CPM. 1X Run Speed 1601 RPM 1 st Critical 2025 CPM
Blower DB 19 3 rd Startup – Frequency Spectra At rotor speed of 1762 RPM, the rotor rub affected 1 st critical has shifted up to 2100 CPM. 1X Run Speed 1762 RPM 1 st Critical 2100 CPM
Blower DB 19 3 rd Startup – Frequency Spectra At rotor speed of 1903, the rotor 1 st critical has shifted up to 2325 CPM. 1X Run Speed 1903 RPM 1 st Critical 2325 CPM
Blower DB 19 3 rd Startup – Frequency Spectra Maximum amplitude of vibration occurred at rotor speed of 2400 RPM when the rotor 1X and rub affected 1 st critical coincide. The data indicated that 2400 was the maximum frequency of the rub affected 1 st critical. 1X Run Blower Inboard Bearing Speed Housing 5.857 in/sec pk 2400 RPM 1 st Critical 2400 CPM
Blower DB 19 3 rd Startup – Frequency Spectra At rotor speed of 2778 RPM, the rotor 1 st critical speed drops slightly to 2325 CPM. The bearing housing amplitude at 1X run speed has dropped from 5.857 in/sec pk to 0.50 in/sec pk. 1 st Critical 2325 CPM 1X Run Speed 2778 RPM
Blower DB 19 3 rd Startup – Frequency Spectra At running speed, the 1 st critical measured about 1425 CPM. 1X Run At operating speed, the packing is Speed not applying any support stiffness 1 st Critical 3562 RPM to the shaft. 1425 CPM
Blower DB 19 3 rd Startup – Critical Speed Map The Blower 1 st Critical Speed Calculated to 1660 (Packing adding no support stiffness). The bearing stiffness calculated using DyRoBeS was appox 1,000,000 lb f /in. Bearing K Calculated Using DyRoBeS
Blower DB 19 3 rd Startup – Critical Speed Map It would be found at disassembly that the shaft bearing fits were undersize and the bearing housing bores were oversize thus providing lower support stiffness than calculated (~500,000 lb f /in). The model represented a new condition blower. Bearing K Based on Vibration Calculated Using Data, Actual DyRoBeS Appox. Installed Brg K ~ 1,000,000 lb f /in 500,000 lb f /in 1425 CPM
Shaft Sealing: Blower OEM Offered Three Options for Shaft Sealing. Packing: Lowest Cost but tight packing rubbing the shaft causes heat, thermal bowing of the shaft and as calculations showed can act as a bearing raising the 1 st critical speed. Packing Box. Carbon Ring Mechanical Seal Figure 2. Seal Options Offered by Blower OEM.
Thermal Growth Measurements: Ludeca Permalign Laser System Ref 7 was Installed on Blowers DB 18 and DB 19 To Measure Thermal Growth. Blower DB 19 was Measured first. The Blower was Shutdown and Allowed to Cool Overnight. Permalign Was Installed After Shutdown. Figure 33. Laser Alignment Equipment, Ludeca Permalign, Ref 7 Installed on the Motor and Blower.
Thermal Growth Measurements: Ludeca Permalign Laser System Ref 7 was Installed on Blowers DB 18 and DB 19 To Measure Thermal Growth. Blower DB 19 was Measured first. The Blower was Shutdown and Allowed to Cool Overnight. Permalign Was Installed After Shutdown. At Startup, Permalign Laser and Accelerometers Moved due to High Vibration. Figure 34. Permalign Setup on Blower and Motor. Ref 7 Blower was Shutdown, Adjustments made & Blower restarted.
Thermal Growth Measurements: The Blower Was Started Two More times then Shutdown and Cooled Overnight Back to Ambient. Cool Down Data Indicated Severe Pipe Stain in the Horizontal Direction. Horizontal Offset Horizontal movement of Blower DB19 Occurred when adjacent blowers are Vertical Offset shutdown . 26 Mils 11 Mils Figure 35. Blower DB19 Cool Down Alignment Data.
Thermal Growth Measurements: The Blower Was Being Pushed/Pulled by Pipe Thermal Growth. The Data in Figure 35 Began Just Minutes Before DB 19 Shutdown. Blue Line Jumps When the Other Two Blowers Shutdown. The Pipe Strain Forces the Blowers Out of Alignment as Much as 20 mlls during Each Blower Startup. Horizontal Offset Horizontal movement of Blower DB19 Occurred when adjacent blowers are Vertical Offset shutdown . 11 Mils Figure 35. Blower DB19 Cool Down Alignment Data.
Thermal Growth Measurements: DB 18 Blower: Permalign Was Installed on DB18 After DB19 Was Re-Aligned and Started. DB18 Was Started and Allowed to Reach Operating Temperature for About 5 Hours, Then Shutdown and Allowed to Cool Overnight. Adjacent Blower Adjacent Blower Running Shutdown Figure 3. Permalign Data File for DB18 Blower. Horizontal Movement Occurs When Adjacent Blower Shutdown.
Thermal Growth Measurements: DB 18 Blower: Results were Similar to DB19. Blower Was Pushed/Pulled When Other Blowers Shutdown. Adjacent Blower Adjacent Blower Running Shutdown 26 Mils 11 Mils Figure 3. Permalign Data File for DB18 Blower. Horizontal Movement Occurs When Adjacent Blower Shutdown.
Blower Repair: DB19 Sent to Blower Authorized Repair Facility. Blower to be: • Disassembled • Inspected • Repaired • Balanced • Re-assembled • Run Tested. Figure 37. Blower DB 19 As Received at Factory Authorized Repair Facility.
Blower Disassembly: The shaft packing area had over 30 mils wear. Blower OEM allows up to 30 mils shaft wear. Packing Wear Area 1 st Stage Deflector Rope Caulking 1st Stage Impeller Figure 38. 1 st Stage Impeller With Figure 39.Shaft Packing Area Deflector and Rope Caulking at the OD. Discolored by Packing Rubbing .
Blower Disassembly: The impeller hub fit to shaft to have metal-to-metal fit (line-to-line). Fretting in Bore – Indication Hub Loose Heating of the Hub Shaft Fit. During Previous Assembly. Figure 40. Impeller #2 Blade Damage. Note Heating of the Hub Which Occurred During Previous Assembly.
Blower Disassembly: Keys Transfer Torque to Each Impeller Hub. Shaft keyseats are machined in 180 degree alternating pattern. Figure 41. Keys Transfer Torque to the Impeller Hubs.
Blower Reassembly: Bare Shaft in Balancing Machine Impellers Stacked, Ready for Installation on Shaft. Figure 42. Bare Shaft in Balancing Machine. Impellers Are Stacked at the End of the Balance Machine.
Blower Reassembly: First Two Impellers and Heat Fan Installed on Shaft. Heat Fan. Figure 43. Impellers Being Installed on Shaft.
Blower Reassembly: Rotor Stacked – Impellers Taped to Prevent Pumping Air (Reduce Wind Resistance). Figure 44. Rotor Stacked, Impellers Taped For Wind Resistance For Balancing.
Blower Balance Report Balance Report of Incoming and Final Balance. Balance correction Near Plane. Balance correction Far Plane.
Blower Balance Report Data from Balance Report used to calculate Serial No. 712311455 the unbalance forces at each bearing. Ubal Ubal Force Far Force Near Plane lbf Plane lbf Initial Unbalance 10.129 oz-in 233.017 12.392 oz-in 285.070 Finish Balance 0.895 oz-in 20.589 0.797 oz-in 18.334 Force Reduction 212.428 266.736 Percent Reduction 91.16% 93.57% grams oz grams oz Correction Weight 0.89 0.03 2.26 0.08 Near ISO G 1.0 19.184 gr-in Side 9.592 Far Side gr-in 0.675 oz-in 0.338 oz-in 15.539 lbf 7.770 lbf Rotor Weight 450 lbf
Blower Balance Report Data from Balance Report used to calculate Serial No. 712311455 the unbalance forces at each bearing. Ubal Ubal Force Far Force Near Plane lbf Plane lbf Initial Unbalance 10.129 oz-in 233.017 12.392 oz-in 285.070 Finish Balance 0.895 oz-in 20.589 0.797 oz-in 18.334 Force Reduction 212.428 266.736 Percent Reduction 91.16% 93.57% grams oz grams oz Correction Weight 0.89 0.03 2.26 0.08 Near ISO G 1.0 19.184 gr-in Side 9.592 Far Side gr-in 0.675 oz-in 0.338 oz-in 15.539 lbf 7.770 lbf Rotor Weight 450 lbf
Rotor Inspection Rotor and Bearing Housing Inspection: Shaft was replaced due to undersized fits. Drive End Shaft Bearing Fit Undersized 0.0062 inch Drive End Shaft Housing Bore Oversized (no measurement on report) Non Drive End Shaft Bearing Fit Undersized 0.0064 inch Non Drive End Housing Bore Over sized (no measurement on report) Max Shaft Wear @ Packing 0.030 in Undersized (no measurement on report) Impeller shaft fits 0.010 inch variation in fit diameters.
Conclusions: The design of the blower rotor was very flexible: • Shaft Diameter to bearing span ratio of >20:1. • The rotor response is primarily controlled by the stiffness of the shaft. • The shaft stiffness is relatively low due to the long bearing span. • The bearings are located close to the 1 st mode nodal points and provide little control of the 1 st critical. Vibration amplitudes of the five blowers tested were well above industrial standards and guidelines published by the Blower OEM. Vibration data on DB19 indicated unbalance of the blower rotating assembly and misalignment as the primary forcing functions. Worn bearing fits and oversized housing bores would have increased unbalance response. Flexing of the skids (frames) supporting the motor and blower was clearly evident in the ODS models. The skid was redesigned by equipment owner using thicker structural elements, additional stiffening and machining of mounting pads coplanar.
Conclusions: The modal test of the blower and motor frame assembly showed a very responsive bending mode of the frame at the motor end within the operating speed range. The natural frequency mode shape was rocking of the motor in the vertical and axial directions. All five blowers tested had high amplitude motor vibration in the axial and vertical directions. It was discovered that stiffener plates/gussets originally provided by the OEM had been removed by maintenance personnel to gain access to hold down bolts. These gussets had not been replaced. Bearing defects were identified by vibration data on several of the motors and blower bearing housings. Inspection of the piping and bellows flexible connectors showed evidence of excessive pipe strain at the blower’s inlet and discharge nozzles due to un-restrained thermal growth of the piping as the blowers cycled on and off. The piping was not adequately supported to prevent excessive pipe strain of the blower nozzles. Permalign data measured on DB18 and DB19 showed over 20 mils relative horizontal movement of the motor and blower during shutdown and cooling to ambient temperature. There were also excessive alignment changes when adjacent blowers cycled on and off caused by thermal growth of the piping pushing/pulling the blowers.
Conclusions: DB 19 vibration test data showed extremely high amplitude vibration during startup and shutdown. A rotor critical speed was indicated at 2400 RPM. Mid-span rub was suspected to act as a third bearing raising the rotor critical from about 1450 RPM to about 2400 RPM. Confirmed by inspection and rotor-bearing model that packing was acting as a third bearing. Other options for sealing are available other than packing which include carbon ring and mechanical seal.
Recommendations: The following recommendations were provided to plant management to improve reliability of the Centrifugal Blowers. Blower overhaul, rotating assembly balancing and mechanical run test. Develop a rotor inspection process and inspection measurements. Rotor multi-plane dynamic balance of rotating assembly Per ISO 1940-1 Balance Quality G1.0. Mechanical run test, 1 hour minimum after temperatures stable. Repair Facility Audit. Incoming disassembly and inspection process. Tolerance for replacement components Access to OEM drawings and specifications. Assembly process – part inspection, shaft and impeller dimensions, allowable runout, balancing process, training of personnel, condition of measuring tools and machine tools. Post assembly run test capability. Modal Test of First Fabricated Skid (New Design). Insure that no structural natural frequencies are with +/- 10% of 1X, 2X run speed. Modify skid design if test results indicate need.
Recommendations: The following recommendations were provided to plant management to improve reliability of the Centrifugal Blowers. Install permanent Accelerometers on the Motor & Blower Bearing Housings. Cable signals to NEMA enclosures located outside the blower area. Consider connecting Accelerometers to IMI Model 682A05 Bearing Fault Detectors which can be monitored by PLC. Blower Nozzle Loading (Pipe Strain) Conduct Piping Study Study to provide recommendations for piping supports and flexible piping connections to the blower nozzles. Obtain allowable blower nozzle loading from OEM.
Action Taken by Management: 1. Witnessing of Blower Disassembly, Repair, Balancing, Reassembly and Run Test was Performed at Authorized Repair Shop. 2. Plant management decision to begin overhauling Centrifugal Blowers in- house. This would provide more control over dimensional accuracy of fits, balancing and assembly procedures. 3. Inspection form developed to document the blower shaft fit dimensions and fit runouts, impeller radial/axial runout. 4. The Skid Frame was Redesigned using Thicker Elements, Bracing and Blower Mounting Points were Machined Co-Planer. 5. The Cork isolation material was changed to meet the blower OEM’s specification. 6. A piping study was conducted. Supports were added to fix the piping at the blowers and reduce pipe strain on the blower nozzles. 7. Ambient alignment Targets were Determined based on Permalign Measurements.
Recommend
More recommend
Explore More Topics
Stay informed with curated content and fresh updates.
