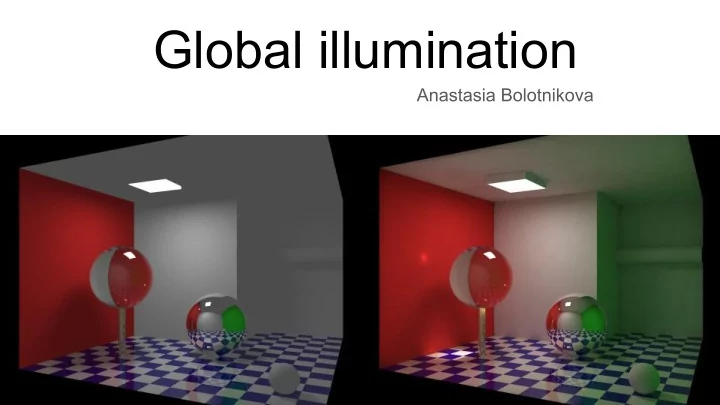

Global illumination Anastasia Bolotnikova
Global illumination a.k.a. GI a.k.a. indirect illumination What? - bunch of algorithms, a process of simulating indirect light Why? - add more realistic lighting to 3D scenes (direct+indirect) Some issues: ● Subjective ● Application based ● No definition of realistic illumination ● Rough approximation of real world scene
Radiosity Calculates the intensity for all surfaces in the environment 1. Divide scene into patches 2. View/form factor for each pair of patches 3. Radiosity of each patch is calculated based on view factors +View-independent +Handles diffuse interreflections between surfaces -Doesn’t account for specular reflections or transparency effects -Only works for lambertian surfaces - same radiance when viewed from any angle
Path tracing Idea: trace the path of a ray which bounces around the scene Monte-Carlo method - stochastically choose direction to bounce +simulates soft shadows, depth of field, motion blur, caustics, ambient occlusion -View-dependent
Sampling Average over 25, 125 and 625 samples per pixel
Photon mapping 1. Shot bunch of photons from light source on the surfaces, let them bounce (ref/trans/obs) maybe -> store photon-surface interactions to get photon map 2. Use photon map to make kd-tree and get intensities of the light by using nearby photons +can handle transparent objects and diffuse reflections +can be used in combination with other methods -full photon map might not be necessary
Intensity calculation 1. Get N nearest photons using the nearest neighbor search in kd-tree 2. Denote S to be a sphere that contains k nearest photons 3. For each photon, divide the amount of flux that the photon represents by the area of S and multiply by the BRDF applied to that photon 4. The sum of those results for each photon represents total surface radiance
Photon maps Number of photons: the more photons emitted, the smoother the solution, but the render times increase Photon intensity: makes the scene brighter by increasing intensities of individual photons Accuracy: the higher the value, the more smoothing, but the longer render times
Thank you for your attention!
Little something extra What happens when the intensity channels of different color space are swapped?
Original RGB
HSY = HSV - V + Y from YUV
HSL = HSV - V + L from HSL
HVS = HLS - L + V from HSV
HYS = HLS - L + Y from YUV
LUV = YUV - Y + L from HLS
VUV = YUV - Y + V from HSV
import cv2 # Get image resultVUV = cv2.cvtColor(yuv, cv2.COLOR_YUV2BGR) img = cv2.imread( 'test.jpg' ) cv2.imwrite( "resultVUV.jpg" ,resultVUV) # Get different color spaces and intensity channels hsv[:,:,2] = l hsv = cv2.cvtColor(img, cv2.COLOR_BGR2HSV) resultHSL = cv2.cvtColor(hsv, cv2.COLOR_HSV2BGR) v = img[:,:,2] cv2.imwrite( "resultHSL.jpg" ,resultHSL) yuv = cv2.cvtColor(img, cv2.COLOR_BGR2YUV) yuv[:,:,0] = l y = img[:,:,0] resultLUV = cv2.cvtColor(yuv, cv2.COLOR_YUV2BGR) hls = cv2.cvtColor(img, cv2.COLOR_BGR2HLS) cv2.imwrite( "resultLUV.jpg" ,resultLUV) l = img[:,:,1] hls[:,:,1] = y # Do the swap and save result resultHYS = cv2.cvtColor(hls, cv2.COLOR_HLS2BGR) hsv[:,:,2] = y cv2.imwrite( "resultHYS.jpg" ,resultHYS) resultHSY = cv2.cvtColor(hsv, cv2.COLOR_HSV2BGR) hls[:,:,1] = v cv2.imwrite( "resultHSY.jpg" ,resultHSY) resultHVS = cv2.cvtColor(hls, cv2.COLOR_HLS2BGR) yuv[:,:,0] = v cv2.imwrite( "resultHVS.jpg" ,resultHVS)
Recommend
More recommend