EVALUATION, MODIFICATION AND DAMAGE TOLERANCE OF AN IN-SERVICE - PowerPoint PPT Presentation
EVALUATION, MODIFICATION AND DAMAGE TOLERANCE OF AN IN-SERVICE AIRCRAFT CRITICAL AREA 25th ICAF Symposium Rotterdam, 2729 May 2009 R. S. Rutledge, D. S. Backman and R. J. Hiscocks R. S. (Bob) Rutledge , P.Eng Senior Research Officer,
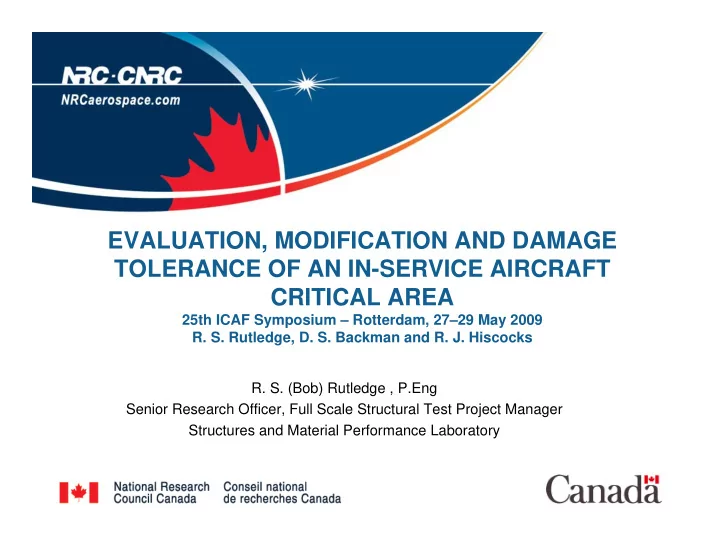
EVALUATION, MODIFICATION AND DAMAGE TOLERANCE OF AN IN-SERVICE AIRCRAFT CRITICAL AREA 25th ICAF Symposium – Rotterdam, 27–29 May 2009 R. S. Rutledge, D. S. Backman and R. J. Hiscocks R. S. (Bob) Rutledge , P.Eng Senior Research Officer, Full Scale Structural Test Project Manager Structures and Material Performance Laboratory
Presentation Overview • Introduction • FT312 Test Objectives • Methodology • Test Operation • Residual Strength Test • Conclusions 2
Introduction In the beginning… • In the early 1980s, the CF bought a new fighter – the McDonnell Douglas F/A-18, or CF-188 as it was called in Canada. • A twin engine, single or dual seat, multi-role aircraft designed for the USN, the F/A-18 was also bought by Australia, Switzerland, Spain and Switzerland. 3
Introduction Definition…IFOSTP • IFOSTP – International Follow-On Structural Test Programme A joint venture between the air forces of Canada and Australia, with the support of their various national institutions and contractors. The IFOSTP came out of informal discussions at TTCP meetings. • In Canada – National Research Council Institute for Aerospace Research and L-3 Communications MAS/Bombardier. • In Australia – Defence Science and Technology Organisation Aeronautical and Maritime Research Laboratory. 4
Introduction Reasons for IFOSTP • USN requirements were for a safe-life design, CF lifing policy required a different approach. This lead to different interpretations of certification test results. • USN usage spectrum (design and service) much less severe than CF. • Fatigue usage rates in early CF flying projected a very early fleet retirement. 5
Introduction The IFOSTP Tests • In Australia: FT46 – real-time quasi-dynamic test of the rear fuselage and empennage. • In Canada: FT55 – at L3 Com / BA, Mirabel. Fatigue test of centre fuselage. FT245 – at IAR, Ottawa. Fatigue test of inner and outer wing boxes. 6
Introduction IFOSTP Wing …. Certification • FT245, was the primary means of wing structural certification. • Three repeated load lives of simulated flight hours (SFH) provided proof that the wing could safely fly for the design-life flying objective using CF missions. • NRC developed method to characterize the dynamic content of the wing loads spectrum. • Test spectrum was for an average aircraft in a severe squadron based on MSDRS data statistics 1989-1990. 7
Introduction Wing Spectrum … • Spectrum designated IARPO3a and included dynamic loads caused by trailing edge and wing tip buffet. • Wing test - dynamic loads at the control surface attachments on the trailing edges were severely truncated to complete the fatigue testing within the client desired time frame. • Consequently some areas of the wing susceptible to dynamic loads may have been under tested. 8
Introduction In service damage … • Cracks were found in the wing-fold aft-spar shear-ties of in- service aircraft. • FT245 fatigue test spectrum was not severe enough? or Surface preparation for strain gauges may have removed acid etched surface damage - typically present on all aluminium on this aircraft. • Acid etch damage - a by product of the cleaning process applied just prior to corrosion prevention ion vapour deposition at manufacture. 9
Introduction Repairs Proposed … Test • To repair the cracks in the fleet wing shear-ties, various blends were proposed. • Due to the severity of the problem, NRC Canada - tasked for a local fatigue test on the aft-spar shear-tie on an inner wing. 10
FT312 Test Objectives Fatigue Test … Repair and Continue • Locally test the wing-fold aft-spar shear-tie. • Generate cracking similar to that found in-service. • In-service repair via structural modification proposed for area. • Determine the post-modification life under representative spectrum for five repeated load lifetimes (RLLs). • Generate test crack growth data - management & provision of fleet modifications. 11
Methodology Specimen • Port Wing of FT245 was used as the test specimen. • Serial A12-0312 was retired, 60% of one RLLs of usage. • Wing fold shear-tie area not loaded during FT245 testing. 12
Methodology Test Rig Configuration • Double lug arrangement. • Single actuator / load cell. • Three different offsets considered in the spectrum development. 13
Methodology Strain Survey…. Configuration 47% DLL Down • Pre-test strain survey used to obtain desired strain distribution. • Strains measured using digital image correlation and eight strain gauges. • A 7.62 mm (0.3 inch) lug aft offset was selected for the fatigue test. 47% DLL Up Load 14
Methodology Spectrum • Alternate fins off/fins on blocks, 7421 and 7411 lines respectively. • After repair the spectrum adjusted to meet the intended blend stress. • Required peak load post mod to be reduced by ~ 8%. 15
Methodology Instrumentation • Eight strain gauges installed. • Ultrasonic sensor located on the shear-tie, opposite the critical radius, to monitor flaw size. Ultrasonic Sensor Reflectoscope • Digital image correlation. 16
Test Operation Regular operation… • Daily monitoring. • Rig inspections. • Examined digital image correlation data. • Trend monitoring. • Error monitoring. 17
Test Operation Strain Sequences... • Full Sequences - load & strain were recorded - blocks 1, 2, 3, 4. • After the spectrum changed blocks 15 and 16. 18
Test Operation Trend Monitoring... • All blocks - a limited number of end levels were recorded to enable trend monitoring. • 73%, 47%, -47% and -69% of design limit load (DLL) during the pre-modification spectrum. • 68%, 47%, -47% and -63% DLL during the post-modification blocks 19
Test Operation Digital Image Monitoring... • All blocks – each peak down load was recorded to enable trend monitoring of surface strains. 1.26 RLL 1 RLL 1 RLL Test Start .6 RLL 6-9% Increase Little Change Little Change 20 Post Mod 1.33 RLL Post Mod 2 RLL Increase
Test Operation Inspection... • No planned inspections. • Automated ultrasonic inspections continuously. • Surface strain measurements. • Ultrasonics set to 0.13-0.25 mm first triggered at 1 RLL to stop testing. • 49 Ultrasonic stops from 1 - 1.3 RLL. • Test stopped LPI inspection 1.32 RLL. 21
Test Operation Crack Excision... Quantitative Fractography • Crack excised. • Quantitative Fractography. • Crack Growth. 22 QF carried out by QETE – Dr. Roth
Test Operation Repair... Blend • At 1.32 RLL the a hand blend and polish of the cracked area. • Area was repainted for surface strain measurements. • High strains measured. • Image correlation also used to extract blended geometry for FEM. • Resulted in spectrum modification of peak loads. 23
Test Operation Continued... Testing • By 2.0 RLL strains were increased in the critical area. • Visible cracking found at 2.3 RLL. 24
Test Operation Long stable… Crack growth • Triggered digital image correlation - monitored growth 24/7. • Fatigue testing required minimum 5 RLLs post-modification. First Principle strains 25
Residual Strength Test Residual Strength... Testing • At 7.75 RLLs a residual strength test to failure was carried out. • Failure surface used for quantitative fractography. FT312 Sequential Linear Crack Growth Data for the Upper Terrace • QF confirm long stable cracking. 16 14 12 Crack Length (mm) 10 8 6 4 2 • Mod delayed the cracking 0 0 1 2 3 4 5 6 7 Lifetimes of fitting by only 43% of one RLL. FT312 Sequential Semi-Logarithmic Crack Growth Data for the Upper Terrace Inches 100 3.937 0.3937 10 Crack Length (mm) 1 0.0394 0.1 0.00394 0.01 0.0003947 26 0.0000394 0.001 7 0.0000039 0.0001 47 0 1 2 3 4 5 6 7 Lifetimes
Residual Strength Test Residual Strength... Testing Residual Strength Test Wing Fold Shear Tie Measured Strains • The residual strength test 3000 applied loads in 10 % increments 2500 952S14L1-4-A_v2 952S14L1-4-B_v2 2000 952S14L1-4-C_v2 to the spectrum peak. 952S14L1-5-A 1500 Strain (micro- inches per inch) 952S14L1-5-B 952S14L1-5-C 1000 952S14L1-11_v2 500 0 • Loads were then applied in 2% 0 1000 2000 3000 4000 5000 6000 7000 8000 -500 increments to failure. -1000 -1500 -2000 Load (lbf) • Failure occurred at 87.5% DLL and 128% of the peak spectrum. • Strains measured by gauges did not exceed 3000 microstrain. 27
Residual Strength Test Tested to 87.5 %DLL…. 120 % DLL req’d … • Post RST found semi-circular fatigue cracking. • Failure stress was estimated and RST curve was generated. • DLL defined, Gumble extrapolation of test spectra- Berens Methodology. 28
Recommend
More recommend
Explore More Topics
Stay informed with curated content and fresh updates.
