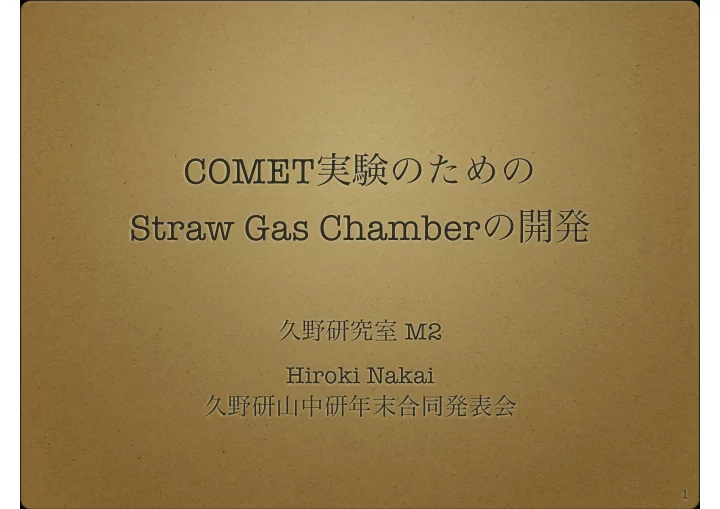
COMET Straw Gas Chamber M2 Hiroki Nakai 1 t n e - PowerPoint PPT Presentation
COMET Straw Gas Chamber M2 Hiroki Nakai 1 t n e m i r e p x E T E M O C Search for Muon to Electron Conversion at Pulsed Proton Beam a
久野研山中研年末合同発表会 COMET 実験のための Straw Gas Chamber の開発 久野研究室 M2 Hiroki Nakai 1
t n e m i r e p x E T E M O C • Search for Muon to Electron Conversion at Pulsed Proton Beam a sensitivity better than 10 -16 Production Target muon transport (curved solenoids) The Muon Source • Pion Production Target electron • Pion Capture Solenoid transport Stopping • C-shape Muon Transport Target The Detector • Muon Stopping Target muon stopping • C-shape Electron Transport target • Electron Detection ELECTRON TRACKER and calorimeter 2
Why need Straw ? Electron Tracker is placed in vacuum(Detector solenoid). should withstand for vacuum operation(pressure difference,etc...) Electron Momentum Counts per 0.05 MeV/c Sufficient energy resolution 0.25 0.2 COMET requires better energy 0.15 resolution than 1MeV 0.1 0.05 0 103 103.5 104 104.5 105 105.5 106 Momentum (MeV/c) 3
JP Straw chamber purposes 1. Build (nearly) Full-Scale Prototype approx. 1m length wounded Mylar straw thickness of straw is 25µm 2. Test in Vacuum Establish the stable operation ✦ Checks, not only gas leak ✦ but also deformation 3. Integrate Relevant Items Front-end Electronics ✦ HV , Gas Controlling, Slow Control System, etc. ✦ 4
Straw Chamber Design Work Part of Drawing(Straw jig & Manifold Design) Cross Section View Side View Schematic View Straws Gas Gas Top View HV Gas The diameter of Mylar Straw is 5mm. Double plane (4tubes + 3tubes) 1single tube chamber, 2double plane chamber 1double plane chamber will be studied by glued each other With Large Gas-manifold to contain HV traces,readout front-ends 5
Straw Chamber Gas Manifold General view Straw Jig 6
Study Items Gas leak Study First, studied by pressurized 2 atm in air Second, studied by measuring pressure build-up in vacuum Deformation Study Small deformation was measured by capacitive sensors as a function of position along wire AG Contrinex AG capacitive sensor e sensor 7
Duration[min.] Gas Leak Study 2 atm Operation Vacuum Operation Vacuum Rate[Pa.] Graph_Build 2 2 / ndf / ndf � � 3.579 / 164 3.579 / 164 180.0"" 3 × 10 Prob Prob 1 1 y"="0.4458x"+"11.887 � Pressure[Pa] with Ar Gas p0 p0 160.0"" 202 2.025e+05 2.025e+05 ± ± 93.27 93.27 p1 p1 -0.1473 -0.1473 ± ± 0.005403 0.005403 140.0"" 201.5 120.0"" 201 100.0"" 200.5 80.0"" 200 60.0"" Non-Gas 199.5 40.0"" y"="0.0231x"+"8.2014 � 199 20.0"" 0.0"" 130001400015000160001700018000190002000021000 0" 100" 200" 300" 400" 500" 600" Duration[min.] Duration[sec.] Gas Leak Study (Preliminary) 2 atm Operation ~0.6199cc/min. Vacuum Operation ~0.2267cc/min. not consistent... 8
Straw Deformation Pressure Opreration Vacuum Operation 2 2 / ndf / ndf � � 3.667 / 2 3.667 / 2 2 / ndf � 1.906 / 1 Prob Prob 0.1598 0.1598 70 Prob 0.1675 Deformation[um] Deformation[um] p0 p0 -146 -146 ± ± 6.106 6.106 p0 83.47 3.895 ± 140 p1 p1 0.1355 0.1355 0.003277 0.003277 65 ± ± p1 -2.731 0.4928 ± 60 120 55 50 100 2 / ndf � 0.9228 / 2 45 Prob 0.6304 2 / ndf � 0.24 / 1 80 p0 -60.46 3.063 ± 40 Prob 0.6242 p1 0.05909 ± 0.001644 p0 56.74 1.382 ± 35 60 p1 -3.119 ± 0.1749 30 40 25 20 1500 1600 1700 1800 1900 2000 6 6.5 7 7.5 8 8.5 9 9.5 10 Vacuum_Rate[Pa] Pressure[hPa] Deformation Study (Preliminary) 2 atm Operation ~60µm (at 1/4 straw ) ~140µm (at 1/2 straw ) Vacuum Operation(Vacuum rate : 6.32 Pa) ~37µm (at 1/4 straw) ~67µm (at 1/2 straw) From My calculation, deformation is ~8µm Any result is not consistent... 9
Chamber Signal Raw Signal Raw Signal Raw signal is very good S/N Raw signal level is ~8mV DAQ QDC&TDC data is being acquiring with B-ray Source(Sr90). QDC shows reasonable landau TDC( very preliminary ) QDC( very preliminary ) distribution. htdc20 hqdc23 htdc20 htdc20 TDC shows drift time distribution. hqdc23 hqdc23 22 Entries Entries 1385 1385 7 Entries Entries 1612 1612 Mean Mean 4.904e+04 4.904e+04 Mean Mean 510.8 510.8 20 RMS RMS 1.066e+04 1.066e+04 RMS RMS 189.5 189.5 6 Underflow Underflow 0 0 18 Underflow 0 Underflow 0 Overflow Overflow 0 0 Overflow Overflow 0 0 in order to investigate the Integral Integral 1385 1385 16 Integral Integral 1612 1612 5 14 4 intrinsic position resolution, 12 10 3 X-T relation will be extracted 8 2 6 from data. 4 1 2 × 3 10 0 psec 0 20 40 60 80 100 120 140 0 0 500 1000 1500 2000 2500 3000 3500 4000 10
s i h t r e t f A Test in Vacuum(progressing) Need to operate straw chamber in Vacuum chamber. Gas Leak needs to be measured again with N2 gas for Pirani- gauge calibration. Deformation needs to be Corrected , because sensors were leaning. Deformation needs to be measure at another Vacuum rate. Need to another study In order to reduce deformation and gas leakage, gluing study between straws will be done, etc... Analysis about straw chamber for COMET operation. 11
SUMMRY COMET is aiming a sensitivity better than 10 -16 Built full scale prototype of COMET straw gas chamber approx. 1m length, straw is 25µm thickness,5mm in diameter Test in Vacuum(progressing) Measured deformation. ~140µm at 2 atm operation,~67µm at Vacuum operation Gas Leak is measured. 0.6199cc/min. at 2 atm operation, 0.2267cc/min. at Vacuum operation Pressure study is not consistent with vacuum operation... Merry Ch rs mas!!! The Straw Chamber can be operated in the air. This R&D is just started, More studies will be done! @KEK... 12
THE END of SLIDES 13
Back up Slides 14
Capacitive Sensor 時間変化 2.738% 2.736% 2.734% 2.732% �� 1% 2.73% 2.728% 2.726% 2.724% 0% 50% 100% 150% 200% 250% 300% 350% 400% 15
Straw Chamber Design Work Part of Drawing(progressing) Cross Section View Schematic View Straws Gas Gas HV Gas Manifold Design(progressing) Side View Top View Status:Almost Finished ✦ Double plane(4tubes + 3tubes) ✦ 1single tube chamber,2double plane chamber ✦ 1double plane chamber will be studied by glued each other ✦ With Large Gas-manifold to contain HV traces,readout front-ends ✦ 16
To Do Lists Straw Chamber Chamber Construction Vacuum Chamber Gas Control System Front-end Electronics Trigger Data Acquisition System Study Tools Capacitive Sensor study 2atm Operation study 17
Capacitive Sensor Calibration Calibration In Air Calibrate with M6 Cap +1cm × 1cm Alumi tape In Chamber&Vacuum Calibrated Result Repeat Accuracy is not so good Use only slope � M6 �� +1cmAlmi# 12.0000## 1 ��� 12.0000## � M6 �� +1cmAlmi# 10.0000## 10.0000## 2 ��� � M6 �� 8.0000## 8.0000## +1cmAlmi# ������ 1# 3 ��� 6.0000## ������ 2# � M6 �� 6.0000## +1cmAlmi# ��� 4 ��� 4.0000## 4.0000## Vacuum# � M6 �� +1cmAlmi# 2.0000## 2.0000## 5 ��� � M6 �� 0.0000## +1cmAlmi# 0.0000## 0# 1# 2# 3# 4# 5# 6 ��� 0.0## 1.0## 2.0## 3.0## 4.0## 5.0## 18
Capacitive Sensor Calibration Calibration In Air Calibrate with1cm × 1cm Alumi tape Medianfit 2 2 � � / ndf / ndf 6.028 / 9 6.028 / 9 Result Prob Prob 0.7372 0.7372 7.5 Voltage[V] p0 p0 -2.083 -2.083 ± ± 0.1604 0.1604 Repeat Accuracy is not so � p1 p1 2.708 2.708 0.04766 0.04766 ± ± 7 good 6.5 Use only slope 6 5.5 5 4.5 2.6 2.8 3 3.2 3.4 Distance[mm] 19
Vacuum Chamber Status:Ready 2m length in order to contain full-size prototype (1m tube with ~20m manifold on both ends) the degree of Vacuum is 6.7pa(with nothing included in chamber) Build up test is done. 20
Trigger Status:Under Consideration Basically, we may use scintillation counter for RI sources and cosmic rays... just usual way.... Pencil Trigger counter is readied. Tested in Vacuum chamber. 21
Vacuum Operation Detectors is placed in vacuum. 22
Data Acquisition System Status:Will be finished soon VME;TDC + ADC(minimum set) Modified CAEN sample codes with CAEN’s APIs. 23
Roesti project (Tatsuya Part) (Read-Out Electronics for Straw Tube Instrument) 150mm Good Point Signal I-V transition Front-end Low noise Form waveform ADC 110mm DRS Waveform ASD Wave sampling Low power FPGA Signal Digitizer Ethernet ASD DRS ADC Data Suppress FPGA High speed data transfer Ethernet Data Transfer For offline analysis... Waveform sampling enables to deal with pile up and to get better time resolution. For operation in vacuum... Low power consumption Reduce number of feedthrough by using an RJ45 connector . 24
Recommend
More recommend
Explore More Topics
Stay informed with curated content and fresh updates.

