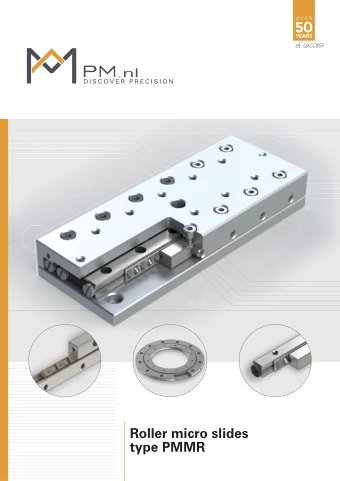
Ball micro slides type PMM TECHNISCHE DATEN ASSEMBLY The mounting - PDF document
Ball micro slides type PMM TECHNISCHE DATEN ASSEMBLY The mounting holes of each type are drilled to a standard confjguration in slide-top and -base and permit the user a quick attachment into the application. Thread holes in the table parterre
Ball micro slides type PMM
TECHNISCHE DATEN ASSEMBLY The mounting holes of each type are drilled to a standard confjguration in slide-top and -base and permit the user a quick attachment into the application. Thread holes in the table parterre according to ISO-standard. Dimensions in this catalogue are in mm. Pm linear slides are precision devices and require proper mounting to preform at rated specifjcations. They have to be mounted on rigid and fjne-machined, preferable by fjne-milling, fmat surfaces and supported over their entire base length. Hereby the characters qualities of PM linear slide will be shown to full advantage LOADS AND MOMENTS The slides listed in this catalogue are able to carry loads and moments in any direction. The load ratings are based on the fundamentals established by ISO and DIN for the calculation of roller bearings (ISO standard 281, for miniature slide type PMM DIN 636, part 3). VACUUM AND CLEANROOM COMPATIBLE To ensure the high running accuracy and to prevent SLIDES against play, vibration and overloads have to be avoided. The load capacity C, defjned in ISO76-1987, is the Most of the PM slides can be prepared for use in (ultra- maximum downward load or force located in the center high) vacuum or cleanroom environments. Special care of the upper part in horizontal zero-position. has to be taken for example with the selection of the low MI = Pitch moment: when a load is cantilevered (not outgrossing materials, special lubricants, surface fjnis- symmetrically mounted) off the ond of an axis, hings, vented stainless steel fasteners for use in blind parallel to the direction of travel. tapped holes, special ball- or crossed roller cages and with Md = Roll moment: Wehn a load is cantilevered off the the selection of switches and wires. For the assembly of side of an axis, perpendicular to the direction of the tables we use modern cleanroom cells unto ISO/FDIS travel. 14644-1 class 5 with clean spots class 3. Mr = Yaw moment: when a force causes a rotation With over 50 years experience in this fjeld we are ready to moment about the center of an axis. meet the most challenging requirements. Exceeding of the listed moment ratings may reduce the For more information please consult PM. life of the bearings and can degrade accuracy. Please feel free to contact one of our product specialists for more information. 92
M I N I A T U R E S L I D E S P M M The PMM micro slides leading the trend with reduced sizes and weights. The tinny slides are made from corrosion resistant steel. This compact model is showing a consistent high running motion accuracy without clearance by a unsurpassed reliability. Thanks to the innovating design combined with a 4-point ball contact, these slides are showing an extreme low friction resistance with very smooth-running qualities and long operational lifetime. They are factory preloaded by selection on ball diameter. MATERIALS OPTIONS (CONSULT PM) Table parts and balls: stainless steel 1.4034, • Selected slides can be supplied with a height tole- hardness 54 - 57 HRc. Ball cage brass rance of ±0.01 mm • Defjned push force FEATURES AND SPECIFICATION • UHV compatible version • 3 Sizes • All stainless steel version • Can be mounted in horizontal and vertical direction special designed single piece U-shaped cage prevents creeping of the cage and is limited by using Notes by ordering inside screws • Slide-top and -base have equal lengths When ordering please specify the following: • All mounting surfaces are fjnished by precision • Model no. and quantity grinding • All the fmanks of the slide are ground parallel to the Example: 1 piece slide type PMM 2-30 rails and can serve as Reference Faces • The slide-top and -base have tapped attachment holes, drilled to a standard confjguration offering simple mounting • Running accuracies are shown on page 128 121
P M M 0 5 Fig. 1 Type A B C D Stroke H B1 C1 C2 f g h 10 5 2.5 1x5 PMM 05-10 15 7 4 1 10 4 2.1 3.6 3.5 1x8 - PMM 05-15 PMM 05-20 20 15 4 1x12 PMM 05-25 25 20 4.5 1x16 15 5 3.5 1x8 PMM 1-15 PMM 1-20 20 10 4 1x12 PMM 1-25 25 15 4.5 1x16 30 10 6 1.5 20 5 3 5.5 5 1x20 4 PMM 1-30 PMM 1-35 35 25 5.5 1x24 PMM 1-40 40 30 6 1x28 PMM 1-45 45 35 6.5 1x32 PMM 1-50 50 40 7 1x36 PMM 2-30 30 20 5 1x20 PMM 2-40 40 30 6 1x28 PMM 2-50 50 15 8 2.5 40 8 4.5 7.5 7 1x36 7 PMM 2-60 60 50 7.5 3x15 PMM 2-70 70 60 8 3x18 PMM 2-80 80 70 10 3x20 Bold = Short lead time item Regular = Long lead time item - please request for price and delivery time 122
M I N I A T U R E S L I D E S P M M 1 + 2 Fig. 2 m x y C dyn in N Weight (g) Md in Ncm Ml in Ncm Mr in Ncm Fig. 23 2 4.5 1.5 3.2 1 M1.6 4.4 2.75 27 3 5.4 2.2 3.8 1 36 4 7.2 3.4 5.0 1 45 5 9.0 4.7 6.3 1 60 5 15.0 9.0 15.5 2 70 7 18.7 11.0 19.5 2 80 10 18.7 11.0 19.5 2 M2 5.7 4.25 90 12 22.5 16.0 23.7 2 105 14 26.2 19.0 28.1 2 120 17 30.0 22.5 32.4 2 135 19 33.8 27.0 36.8 2 150 21 37.5 31.5 41.3 2 195 28 78.0 40.0 69.8 2 234 36 95.0 50.0 83.6 2 M2.5 8.8 5.5 273 45 109.2 62.5 98.7 2 312 54 124.8 80.0 113.5 2 390 64 156.0 109.2 143.8 2 429 73 171.6 125.0 159.1 2 Units: mm 123
RUNNING ACCURACIES AND TOLERANCES combination it will be more complicated and we offer in PM slides are delivered with accuracies as mentioned these questions our experience. in the table below. The checks on the slides are made in On request the precision slides will be delivered with a unloaded horizontal position.The showned values can also certifjcate of compliance, measured with a HP laser accu- be used for 2-axis combinations. If so, please refer to the racy equipment. belonging slide-strokes. When more axis are used in a Special higher accuracy grade slides can be requested. Straight line accuracy in µm Flatness accuracy in µm Parallism in µm, neutral Type A in mm over travellenght on the side over travellenght on the top position on slide top 25-50 2 2 5 55-95 3 2 6 105-155 4 3 7 RT 160-305 4 3 8 (RTN/RTL) 310-510 4 4 10 510-710 5 4 13 810-1010 5 5 15 25-50 2 2 5 55-95 3 2 5 RTA 105-155 4 3 8 160-305 4 3 10 (RTNA/RTLA) Aluminum 310-510 4 4 15 510-710 5 4 20 810-1010 5 5 25 52-91 2 2 5 106-166 3 2 6 171-314 3 3 7 RTNG 317-517 4 3 10 524-817 4 4 13 824-1028 5 5 15 25-45 3 3 2 55-95 4 4 4 RTS 105-155 5 5 5 15-30 3 4 5 PMM und 35-50 4 4 6 PMMR 60-80 5 6 8 1. STRAIGHT LINE ACCURACY: this is the amount of error deviates from the ideal straight line of travel in the vertical plane. 2. FLATNESS ACCURACY: this is the amount of error deviates from the ideal straight line of travel in the horizontal plane. PARALLISM IN �M, NEUTRAL POSITION ON SLIDE TOP: the paralism of the table surfaces occures unloaded on a fmat, horizontal surface in zero-position. 128
PM RESEARCH AND PRODUCTION FACILITY PM B.V. Galileistraat 2 NL-7701 SK, Dedemsvaart The Netherlands Tel:+31 523 61 22 58 info@pm.nl WWW.PM.NL 2017
Recommend
More recommend
Explore More Topics
Stay informed with curated content and fresh updates.
