Welcome ASC OP/TF6 (OEOSC) Write the standards related to infrared - PowerPoint PPT Presentation
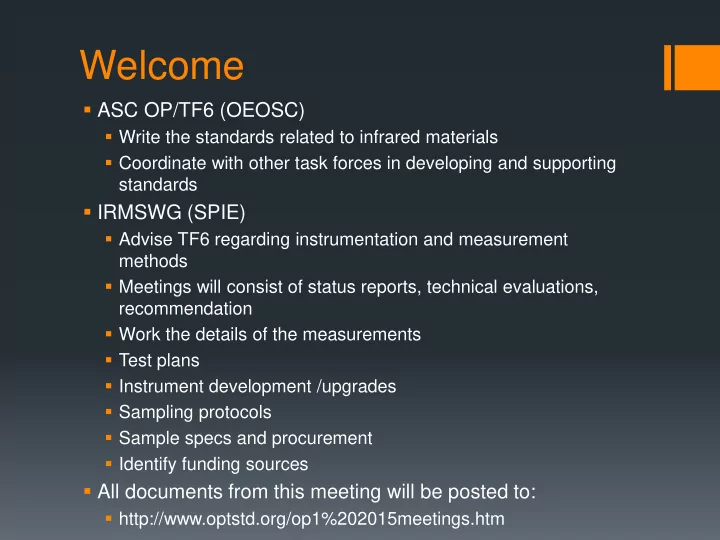
Welcome ASC OP/TF6 (OEOSC) Write the standards related to infrared materials Coordinate with other task forces in developing and supporting standards IRMSWG (SPIE) Advise TF6 regarding instrumentation and measurement methods
Welcome ASC OP/TF6 (OEOSC) Write the standards related to infrared materials Coordinate with other task forces in developing and supporting standards IRMSWG (SPIE) Advise TF6 regarding instrumentation and measurement methods Meetings will consist of status reports, technical evaluations, recommendation Work the details of the measurements Test plans Instrument development /upgrades Sampling protocols Sample specs and procurement Identify funding sources All documents from this meeting will be posted to: http://www.optstd.org/op1%202015meetings.htm
ANSI ASC OP – Task Force 6: IR Materials Standards and SPIE IR Materials Standards Working Group Wednesday, August 12, 2015 Marriott Marquis San Diego Marina 08:00 – 10:00 PDT 333 West Harbor Dr. San Diego, CA 92101 SPIE Optics & Photonics Carlsbad Room
Draft Agenda 1 Welcome, Introductions, and appointment of note taker A. Phenis 2 Adoption of agenda A. Phenis 3 Approval of previous meeting minutes A. Phenis 4 Reports 5 Refractometer measurements update (NIST) J. Burnett 5a Pilot study sample status update A. Phenis 5b Submitted projects update (OEOSC) A. Krisiloff 5c Other reports and updates Project Leaders 5d Group Discussion Topics A. Phenis 6 Time and Place for next meeting - suggestions A. Phenis 7 Adjourn A. Phenis
Approval of previous meeting minutes Previous meeting documents and minutes can be found at http://www.optstd.org/op1%202015meetings.htm
Reports
Refractometer measurement update J. Burnett – NIST
NIST IR Materials Pilot Study - Update John Burnett, Leonard Hanssen, and Simon Kaplan National Institute of Standards and Technology Physical Measurement Laboratory john.burnett@nist.gov Outline 1. NIST Commitment to IR Materials Index Pilot Study 2. NIST Refractometry System 3. Materials 4. Ge Measurements 5. Longer Term Measurement Plans 7 ASC OP TF6 (IR Materials) and SPIE IRMWG Joint Technical Meeting – 12 August 2015
NIST Commitment to IR Materials Index Pilot Study In response to request IRMSWG, NIST (with director’s blessing) committed in 2013 to participate in IR Materials Index Pilot Study with a direction of substantial resources to make most accurate index measurements of key IR materials. • Upgraded sub-ppm-accuracy UV-vis Min-Dev refractometry facility for λ to 14 µ m. • Goal - Maintain UV-vis capability while achieving highest possible IR accuracy for various IR materials with different transmission ranges and other optical properties. • Completed and tested key components in Jan 2015. • Worked with Gary Wiese (Lockheed) to develop optimal specs. for key materials: Ge (single X’tal), ZnSe, ZnS, Si (single X’tal), CaF 2 , BaF 2 , IRG26 (As 2 Se 3 ) (glass), GASIR1 (Umicore glass), and others. Developed priority list - Ge at top. • Started receiving materials (multiple samples from different boule locations). Developed specific measurement strategy for first materials Ge. • Jan. – June, NIST completed other commitments. Started on Ge in July. 8 ASC OP TF6 (IR Materials) and SPIE IRMWG Joint Technical Meeting – 12 August 2015
Index Measurement Issues High-Accuracy Index Measurements: Determine index from minimum-deviation- angle. Actually, requires numerous measurements w/ numerous sources of error. Dev Angle λ Calibrations Goniometer w/ Spectral calibration calibrated encoder lamps Alignment issues At Minimum ( ∆λ ≤ 0.01-0.1 nm) ( ∆ θ ≤ 0.2 arc-sec) Deviation Angle Material Absorb. Prism Apex Angle Transmission Auto collimator + encoder spectrometer ( ∆ θ ≤ 0.2 arc-sec) (A 10 ≤ 0.01/cm) Index Homogeneity n variation on ingot ⇒ Prism Surface Flatness n variation on sample Zygo Interferometer (Wavefront RMS λ /40) Vis/UV interferometer ( ∆ n ≤ 1 x 10 -7 ) Stress Birefringence Temp Control – dn/dT grown-in or external (stress-optic coeff. - π ijkl ) TWP and MPGa calibration ( ∆ T ≤ 5 milli K) Polarimeter (1 nm/cm [ ∆ n ≤ 1 x 10 -7 ]) 9 ASC OP TF6 (IR Materials) and SPIE IRMWG Joint Technical Meeting – 12 August 2015
NIST VUV/IR (0.12 – 15 µ m) Refractometry System sample prism exit/collimation box (rotates) entrance/collimation box detector entrance slit exit slit temp control system purged goniometer sample chamber NIST Refractrometry Facility located at NIST AML 217/F117 • All reflective optics + purge housing + sources/detectors ⇒ operates VUV (120 nm) through 14 µ m. • Temperature range - operates normally near room T (15 - 25 ° C). • Specs.: - FL=0.5 m, F/# = 10. - Goniometer - calibrated angle encoder scale: absolute angle uncertainty ≤ 0.2 arc-sec. - Feedback temperature control of sample to ≤ 5 mK, purge gas to to ≤ 20 mK. ⇒ Absolute index uncertainty depends on λ and sample properties, e.g., size, apex angle, surface figure. Typically: VUV/vis (0.12 – 0.8 µ m): 1- σ ~ 5 × 10 -7 - 5 × 10 -6 + dn/dT in range T (15 - 25 ° C). Near-IR (0.8 – 5.0 µ m): 1- σ ~ 5 × 10 -6 - 4 × 10 -5 Mid-IR (5.0 – 14 µ m): 1- σ ~ 4 × 10 -5 - 8 × 10 -5 • Delivering high-accuracy index results to industries (Litho) for lens design and sample variations. • NIST focus has been highest-accuracy NOT throughput. Laborious process, ~1 week/sample. - Developing index database for values for important optical materials. 10 ASC OP TF6 (IR Materials) and SPIE IRMWG Joint Technical Meeting – 12 August 2015
IR Refractometry System λ range to IR – λ =0.12-14 µ m (T=15-25 ° C) (Consistent w/ ISO/TC 172/SC 3 N223 Test Method for IR Index) • All reflective optics from source to detector. • Blackbody source (1200 ° C), 1 m FL monochromator - Resolution at λ =5 µ m ~ 0.1 nm. • IR detector (Liquid N 2 cooled MCT), lock-in detection. • Index accuracy achieves theoretical limit for material, sample geometry, and sample specs.) Minimum Deviation Refractometer Layout ( FL=0.5 m, F/#=10, temp control: 2 mK rms ) θ /2 θ stacked goniometers Spectral Line Sources Res: 0.2 arc-sec (120 nm – 2.5 µ m) material prism entrance slit vertically-stacked parabolic mirrors exit McPherson Model 2061 slit 1 m FL Monochromator ( λ =185 nm – 20 µ m) entrance (Res=0.01=0.2 nm) slits exit slit chopper Autocollimator for blackbody alignment and apex source IR detector: angle measurements 1200 ° C L-N 2 cooled MCT w/ lock-in detection ASC OP TF6 (IR Materials) and SPIE IRMWG Joint Technical Meeting – 12 August 2015
NIST Refractometry System – Source Side 1-m FL grating entrance exit slit monochromator slit spectral sources UV-vis- Blackbody near IR source 1200 ° C turning mirror input parabolic mirror collection mirror Refractometer entrance slit chopper 12 ASC OP TF6 (IR Materials) and SPIE IRMWG Joint Technical Meeting – 12 August 2015
NIST Refractometry System – Refractometer Side Temp-controlled gas lines purged sample chamber and Temp sensors lines autocollimator for apex-angle MCT measurements detector exit slit entrance slit exit focusing optics input parabolic mirror nested goniometers/ encoders entrance collimating optics 13 ASC OP TF6 (IR Materials) and SPIE IRMWG Joint Technical Meeting – 12 August 2015
NIST Refractometry System – Sample Chamber • Sample alignment: (tilt, min. dev.) determined and monitored before, during, and after meas. by laser alignment system. • T control: PID feed-back loops. ∆ T : sample < 5 mK; ∆ T gas: < 20 mK. Temp control purged sample water tubes chamber - open and Temp sensor lines entrance PRT gas optics Temp sensor PRT prism Temp sensors exit optics Sample Temp prism control sample water jackets 14 ASC OP TF6 (IR Materials) and SPIE IRMWG Joint Technical Meeting – 12 August 2015
Temperature Control Sample- and gas-temperature control by PID feedback control loop. • PRT thermometers calibrated at triple-point water and melting-point of Ga. • PID control loop using mixing of hot and cold baths. • Controls absolute temperature of sample < 5 mK (<2 mK RMS). feedback loop PID Control proportional System valve mixed just PRT thermometers before sample prism sample Heat bath (>set point) Heat bath Pre-cool (<set point) heat bath 15 ASC OP TF6 (IR Materials) and SPIE IRMWG Joint Technical Meeting – 12 August 2015
Calculation of Transmittance Through Air (L=1 m) 16 ASC OP TF6 (IR Materials) and SPIE IRMWG Joint Technical Meeting – 12 August 2015
Calculation of Transmittance Through Air (L=1 m) (same data as above in microns) Calculated Transmittance Spectrum in Air @STP Through L=1 m (from HITRAN) 1 0.9 0.8 0.7 H 2 O 0.6 0.5 H 2 O 0.4 0.3 0.2 CO 2 0.1 0 1 2 3 4 5 6 7 8 9 10 11 12 13 14 15 Wavelength (nm) • Opaque in substantial regions, w/ trans. windows in regions 3-5 and 8-14 microns. • Due primarily to vibration/rotation bands of H 2 0 and to CO 2 . • To obtain accurate index in and near absorption regions, purge with N 2 gas. 17 ASC OP TF6 (IR Materials) and SPIE IRMWG Joint Technical Meeting – 12 August 2015
Recommend
More recommend
Explore More Topics
Stay informed with curated content and fresh updates.

