Sub-sized CVN specimen Uper shelf "Ductile" conversion - PowerPoint PPT Presentation
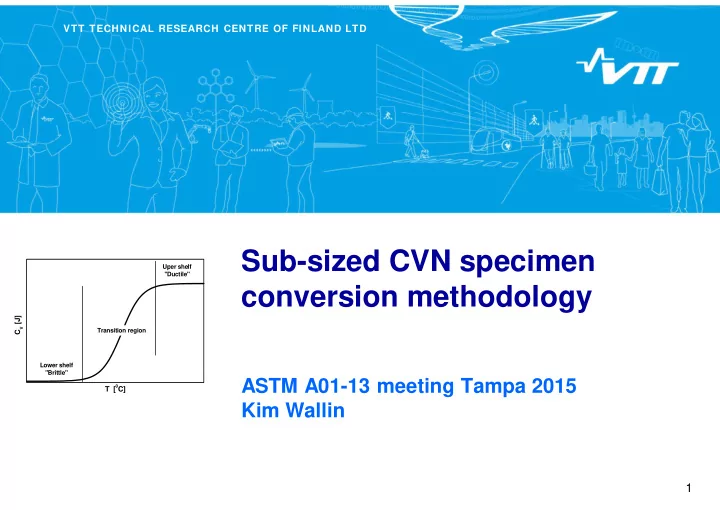
VTT TECHNICAL RESEARCH CENTRE OF FINLAND LTD Sub-sized CVN specimen Uper shelf "Ductile" conversion methodology C V [J] Transition region Lower shelf "Brittle" ASTM A01-13 meeting Tampa 2015 0 C] T [ Kim Wallin 1
VTT TECHNICAL RESEARCH CENTRE OF FINLAND LTD Sub-sized CVN specimen Uper shelf "Ductile" conversion methodology C V [J] Transition region Lower shelf "Brittle" ASTM A01-13 meeting Tampa 2015 0 C] T [ Kim Wallin 1
ASTM A370 Table 9 60 50 Table 9 is based on a simple thickness-ratio 40 correction. KV 10 [J] 30 ASTM A370 Table 9 20 3/4 2/3 1/2 10 1/3 1/4 0 0 5 10 15 20 25 30 35 40 45 KV B [J] 21/10/2015 2 2
Subsized specimens Sub-size specimens yield higher absolute energies 100 1/2 2/3 1/1 A simple ratio-correction 80 is not sufficient for the 60 adjustment of sub-size KV 5x10 [J] Charpy-V specimen 40 energies. 20 0 0 50 100 150 200 KV 10x10 [J] Sub-size specimens yield lower proportional energies 3
Effect of thickness on transition curve 140 McNicol 1965 120 100 2 ] KV/(Bb) [J/cm 80 1.25 60 2.5 5 40 10 15 20 0 -100 -50 0 50 100 150 o C] T [ McNicol, R. (1965, September). Correlation of Charpy Test Results for Standard and Nonstandard Size Specimens. Welding Research Supplement, pp. 385-393. 21/10/2015 4 4
Subsized specimens Sub-size specimens yield lower transition temperature 20 0.25 -1} 2 - 51.4 � ln{2 � (B/10) 95 % TC V28J = TC V35J/cm Similar to a o C] 0 C � � T � 5 2 - TC V28J [ statistical size 0 effect related to 5 % -20 ASME UG-84.2 cleavage initiation. TC V35J/cm See e.g. ASTM Towers -40 E1921. -60 THICKNESS CORRECTION Included in Included in FOR CVN TRANSITION TEMPERATURE -80 BS7910-13 BS7910-13 -100 0 2 4 6 8 10 12 B [mm] Wallin K. Methodology for selecting Charpy toughness criteria for thin high strength steels - Part 1: Determining the fracture toughness: D733. Jernkontorets Forskning, 1994. 5
Subsized specimens Sub-size specimens yield lower transition temperature 20 Similar to a o C] 95 % 2 - TC V28J [ statistical size 0 ASME UG-84.2 5 % effect related to -20 cleavage initiation. 0.25 -1} 2 - 51.4 � ln{2 � (B/10) TC V35J/cm TC V28J = TC V35J/cm See e.g. ASTM -40 Towers 0 C � � T � 5 E1921. -60 THICKNESS CORRECTION Included in Included in FOR CVN TRANSITION TEMPERATURE -80 BS7910-13 BS7910-13 -100 0 2 4 6 8 10 12 14 16 18 20 22 B [mm] Wallin K. Methodology for selecting Charpy toughness criteria for thin high strength steels - Part 1: Determining the fracture toughness: D733. Jernkontorets Forskning, 1994. 6
Subsized specimens Sub-size specimens yield lower proportional upper shelf energies 350 20 mm 9 mm 8 mm 7.5 mm s s dcg dcg s s s s 7 mm 6.7 mm 300 6 mm 5 mm 4 mm 3.6 mm 2 ] 3.3 mm 3 mm 250 C VB-US /(Bb) [J/cm 2.5 mm Some shear Some shear Some shear Some shear All shear All shear All shear All shear and some flat and some flat and some flat and some flat fracture. fracture. fracture. fracture. 200 fracture. fracture. fracture. fracture. 150 Due to a competition 100 between shear and flat fracture. 50 0 0 50 100 150 200 250 300 350 2 ] C V10-US /0.8 [J/cm Wallin K Upper shelf energy normalisation for sub-sized Charpy-V specimens. Int J of Pressure Vessels and Piping, 78, 2001, pp 463-470. 7
Subsized specimens Sub-size specimens yield lower proportional upper shelf energies 1.3 1.2 1.1 (C VB-US x10)/(C V10-US xB) 1.0 1.0 All shear 0.9 0.8 0.7 1 � 0.6 0.5 0.5 0.4 0 20 40 60 80 100 120 C V10-US /B [kN] Wallin K Upper shelf energy normalisation for sub-sized Charpy-V specimens. Int J of Pressure Vessels and Piping, 78, 2001, pp 463-470. 8
Subsized specimens Sub-size specimens yield lower proportional upper shelf energies Normalisation is insensitive to strength but sensitive to modulus of elasticity . � Austenitic stainless slightly different than structural steel. Wallin K Upper shelf energy normalisation for sub-sized Charpy-V specimens. Int J of Pressure Vessels and Piping, 78, 2001, pp 463-470. 9
Subsized specimens Sub-size specimens yield lower proportional upper shelf energies THICKNESS CORRECTION FOR UPPER SHELF 500 B = 7.5 mm B = 5 mm 400 B = 3.3 mm B = 2.5 mm 2 ] KV 10 /0.8 [J/cm 300 200 100 Mean predictions 0 0 50 100 150 200 250 300 350 2 ] KV B /(0.8xB) [J/cm Wallin K Upper shelf energy normalisation for sub-sized Charpy-V specimens. Int J of Pressure Vessels and Piping, 78, 2001, pp 463-470. 10
Temperature adjustment Energy conversion 11
• The conversion accounts for the lower energy required to fracture shear lips. • C V10-US corresponds basically to a value without shear lips. • For high CVN energies the measured full size specimen energy becomes therefore less than indicated by the equation. • Begins to effect when C V10 > 100 J. 12
Energy conversion 300 200 Estimated KV 10 [J] measured KV 3/4 energy. KV 2/3 100 KV 1/2 KV 1/3 KV 1/4 0 0 50 100 150 200 KV B [J] 13
160 140 McNicol 1965 2 ] 120 KV 10est /(Bb) [J/cm 100 80 1.25 2.5 60 5 10 40 15 20 0 -20 0 20 40 60 80 100 120 140 160 o C] T adjusted [ McNicol, R. (1965, September). Correlation of Charpy Test Results for Standard and Nonstandard Size Specimens. Welding Research Supplement, pp. 385-393. 14
50 4340 low toughness 45 40 10 35 7.5 KV 10est [J] 30 5 2.5 25 20 15 � y 1480 MPa 10 5 0 -200 -100 0 100 200 300 400 o C] T adjusted [ Enrico Lucon, C. N. (2015). Impact Characterization of 4340 and T200 Steels by Means of Standard, Sub-Size and Miniaturized Charpy Specimens. NIST Technical Note 1858. 15
140 4340 high toughness 120 10 100 7.5 KV 10est [J] 5 80 2.5 60 40 � y 952 MPa 20 0 -200 -150 -100 -50 0 50 100 o C] T adjusted [ Enrico Lucon, C. N. (2015). Impact Characterization of 4340 and T200 Steels by Means of Standard, Sub-Size and Miniaturized Charpy Specimens. NIST Technical Note 1858. 16
300 T200 250 200 10 KV 10est [J] 7.5 5 150 2.5 100 � y 1134 MPa 50 0 -200 -150 -100 -50 0 50 100 150 o C] T adjusted [ Enrico Lucon, C. N. (2015). Impact Characterization of 4340 and T200 Steels by Means of Standard, Sub-Size and Miniaturized Charpy Specimens. NIST Technical Note 1858. 17
80 X52 70 60 10 KV 10est [J] 6.67 50 5 40 30 � y 325 MPa 20 10 0 -100 -50 0 50 100 150 200 250 o C] T adjusted [ E. Lucon, C. N. McCowan, and R. L. Santoyo, (2015). Impact Characterization of Line Pipe Steels by Means of Standard, Sub-Size and Miniaturized Charpy Specimens. NIST Technical Note 1865. 18
500 X65 400 10 KV 10est [J] 6.67 300 5 200 100 � y 514 MPa 0 -150 -100 -50 0 50 100 150 o C] T adjusted [ E. Lucon, C. N. McCowan, and R. L. Santoyo, (2015). Impact Characterization of Line Pipe Steels by Means of Standard, Sub-Size and Miniaturized Charpy Specimens. NIST Technical Note 1865. 19
500 X70 400 KV 10est [J] 300 10 200 6.67 5 100 � y 503 MPa 0 -160 -140 -120 -100 -80 -60 -40 -20 0 20 40 o C] T adjusted [ E. Lucon, C. N. McCowan, and R. L. Santoyo, (2015). Impact Characterization of Line Pipe Steels by Means of Standard, Sub-Size and Miniaturized Charpy Specimens. NIST Technical Note 1865. 20
300 X100 250 � y 817 MPa KV 10est [J] 200 150 100 10 6.67 5 50 0 -150 -100 -50 0 50 100 150 o C] T adjusted [ E. Lucon, C. N. McCowan, and R. L. Santoyo, (2015). Impact Characterization of Line Pipe Steels by Means of Standard, Sub-Size and Miniaturized Charpy Specimens. NIST Technical Note 1865. 21
Upper shelf behaviour 1.2 4340L 4340H (KV B x10)/(KV 10 xB) T200 X52 1.0 X65 KV 10 > 400 J X70 X100 0.8 0.6 0.4 0 20 40 60 80 100 120 KV 10 /B [kN] 22
400 a � U <450MPa P M The ASTM 350 � U =500-550MPa 0 0 8 = � U =600-700MPa hammer show ISO/DIN ISO/DIN � U 300 � U = 450 MPa � U >800MPa for high C V [J] ISO 250 toughness 30° 30° 200 higher energies � � than the ISO 2 � � � � � � C J 150 � � � � � V ASTM C J C J 12 � � � � r = 2 mm r = 2 mm � V V ISO ASTM hammer � � MPa U 100 r = 8 mm r = 8 mm ASTM ASTM 30° 30° 50 4 4 0 0 50 100 150 200 250 300 350 400 450 500 C V [J] ASTM E23 23
energy conversion Full size 3/ 4 2/ 3 1/ 2 1/ 3 1/ 4 [J] [J] [J] [J] [J] [J] 7 7 5 3 2 10 10 9 7 5 3 14 temperature adjustment 12 11 8 5 4 16 13 12 9 6 4 18 Thickness Adjustment [°C] 15 13 10 7 5 20 Full size 0 16 15 11 7 5 22 20 18 13 9 7 3/4 8 27 25 23 17 11 8 34 2/3 11 31 27 20 14 10 41 1/2 20 36 32 24 16 12 48 1/3 34 40 36 27 18 13 54 1/4 45 45 40 30 20 14 60 51 45 34 22 16 68 57 51 38 25 18 76 65 57 43 27 19 86 75 66 49 31 20 100 24
TECHNOLOGY FOR BUSINESS 25
Recommend
More recommend
Explore More Topics
Stay informed with curated content and fresh updates.
