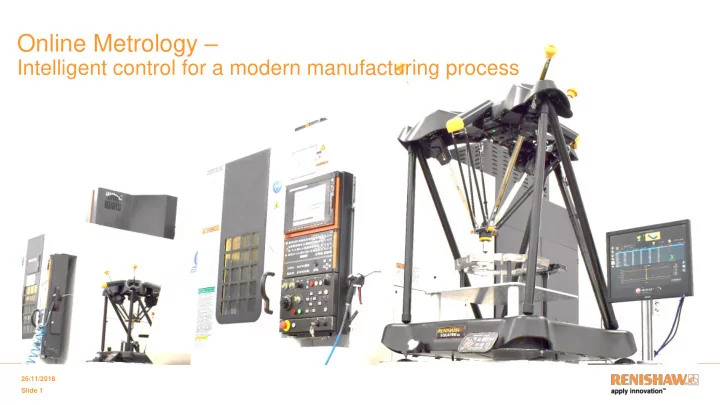

Online Metrology – Intelligent control for a modern manufacturing process 26/11/2018 Slide 1
As a Solution partner, our strength is our deep understanding of manufacturing processes and increasing productivity by different précised means. Amit K. Choudhary Business Manager India Measurement & Automation Products Division 26/11/2018 Slide 2
Current Market Status Majority of auto OEMs are retooling the lines to meet BSIV to BSVI transition Tolerances are getting tighter Volumes are increasing drastically Industries are striving towards Industry 4.0 Every one wants to eliminate human error and automate processes. 26/11/2018 Slide 3
Is it just the case of … Buying more equipment (machines, robots, etc.), employing more people Buying smart & intelligent machines? What do we mean by these smart machines? How are they different than what we have on our shop floor today? Are they any different?? …Are we looking at Industry 4.0 as hope OR opportunity? 26/11/2018 4
Industry current requirement's & key objective’s S.No Production Quality 1 In process Setting of Tool wear drifts To eliminate bottle neck at CMM Lab. 2 Zero rejection To supply inspection data asap to help production give correction 3 In process setting of Position drifts w.r.t drawing To check parts as per quality drawing inclusive of datums dimensional and GD&T parameters like circularity, flatness etc. 4 Having inspection data at Point of manufacturing To record data for future traceability 5 Operation wise data to avoid taking any action correction before going for next OP 6 Lesser dependency on end of line inspection just for segregating parts for OK and Not OK 7 Achieve better Cp & Cpk values always. 26/11/2018 Slide 5
Current Manufacturing Process 26/11/2018 Slide 6
What do you think, Will adding Robots and automating the material handling will solve the issue ? 26/11/2018 7
However there is a difference in automating machine tending and automating the complete process 26/11/2018 Slide 8
Hurdles that can occur in an automated transfer line 26/11/2018 Slide 9
Elements affecting majorly in any automated line 26/11/2018 Slide 10
Temperature fluctuations on shop floor over the day and months 26/11/2018 Slide 11
Other factors that causes process variations are Machine Tool wear thermal dynamics Environment Material 26/11/2018 Slide 12
Robots and automation alone cannot meet the required yield Even though we believe we are becoming more efficient, we are in-fact decreasing efficiencies
Process control is THE ONLY way to achieve greater efficiency
What is the Renishaw Equator™ Gauge? Consider inspection on the shop-floor 26/11/2018 Slide 15
What is the Renishaw Equator™ Gauge? • Equator is a comparative gauge • Not an absolute metrology device like a CMM. • A comparator for medium to high volume gauging • Robust – proven on the shop-floor and thermally ‘insensitive’ • Versatile - Able to switch between multiple parts (Not Tailor made like multi gauge) • In Process Tool Wear compensator • In Process Position (w.r.t. different datums) compensator • Form measurement at Shop Floor (GD&T) 26/11/2018 Slide 16
The role of Renishaw Equator™ Systems on the shop -floor As a standalone Gauging System As part of an Automated Cell Allows manual or automatic in-process Delivers all the benefits of a standalone Equator corrections at point of manufacture Connection to robots and controllers eliminates Targets key manufacturing operations human error and boosts throughput Reduces the need for end of line sample Parts can be sorted and palletised inspection for QA Full lights-out manufacturing is achievable 26/11/2018 Slide 17
Traditional manufacturing Environment High labour cost Low productivity Skilled operators High quality costs Queuing Remote QC area
Major Challenges to incorporate automated process control 26/11/2018 Slide 19
Current Manufacturing Process 26/11/2018 Slide 20
How Equator can play a vital role How Equator can make a difference? • Can Inspect part just after manufacturing (100 plus Equator running in Indian shop floor, also more than 4000 Equators running globally) • Get RESULTS AT POINT OF MANUFACTURING – Multiple form of results can be displayed 1. Results wrt to quality drawing similar to what you get from high end scanning CMM 2. Results wrt to production / process setting drawing. (For eg. Production supervisor will not be much interested to learn what the parallelism is between to opposite planes, rather he will be interested to know the Angle between planes to take corrective action) Tool Wear data (eg CNC No 045 – Tool No – 5 – Wear 30 microns, height 10 microns) 3. Position control data (eg CNC No 045 – Line no 65 – G54 needs a correction of 68 4. microns in X and 48 microns in Y) 5. Live update of the process flow. 26/11/2018 Slide 21
Smart Factory Process flow Ultimately what we want is to manufacture In Line Process all OK parts as close to Control nominals and have better Cp & Cpk 1. Inspect every 3 th or 5 th part coming out from Post Process Verification / Line. 2. Only inspect CTQ parameters – Cover only Certification tight tol features TOOL wise. Eg. If 9 tools required for manufacturing crank case than measure only 9 features having tight tolerance. 3. Update Tool Wear from the results 4. Update Positions wrt datums and distances Inspect all parameters on from the results. CMM once a week/fortnight .(customer can decide frequency) 26/11/2018 Slide 22
Future factory – our view Direct process High control productivity Low labour costs Highly automated Lower quality costs Intelligent manufacturing
IPC – Intelligent Process Control Software 26/11/2018 Slide 24
PROCESS CONTROL SOLUTION FOR CRANK CASE COMPONENT Details Post Frequency based inspection of all parameter process Monitoring In process Thermal Growth in Z Axis 100% inspection on Shop floor Control Tool setting Process setting Machine health checkup (Pitch error) Process Foundation Quality Gate with “OK” Challenges in crank LH Crankcase Line Marking case manufacturing Cockpit • Bore size • Coordinates • Milling Height/Depth • R face Washing OP20 OP10 OP10 OP20 OP30 M/c Conventional method CMM, Multi Gauge, Height Gauge, Air Gauge, Zoller Tool Cockpit setter Quality Gate with “OK” Marking RH Crankcase Line
PROCESS CONTROL SOLUTION FOR CRANK CASE Alternate solution used in the COMPONENT Details Conventional Challenges in crank industry method case manufacturing • CMM, Multi Gauge, Bore size • Coordinates Height Gauge, Air • Milling Height/Depth Gauge, Zoller Tool • R face setter LH Crankcase Line Gauging for RH Cockpit Gauging for LH Comparison against Equator Washing • Two gauging system required M/c • Investment up 40L • Every year calibration & AMC OP10 OP20 OP30 • No provision to add feature Quality Gate • No GD&T feature inspection with “OK” • Not feasible to check coordinates Marking (Dependency on CMM) Cockpit • Suitable only for dedicated RH Crankcase Line component
Renishaw Process control solution : Equator 500 with IPC OP 30/40 Mazak J500 Vari axis Line Line Intelligent Process Control 2 1 OP20 OP20 Mazak VMC Mazak VMC Intelligent Process OP20 OP10 Doosan Doosan VMC VMC Control OP20 OP10 OP20 OP20 Doosan Doosan Mazak VMC Mazak VMC VMC VMC OP10 Mazak VTL SPC Display SPC Display screen 2 screen 1
Process Control solutions for 5C 26/11/2018 Slide 28
The Solution Process for Transmission shaft First part Measure Calculate the Cut a part the part tool offset Automatically feed back 100% of tool offset 26/11/2018 Slide 29
The Solution Process All other parts Calculate average Continuously cut Measure tool offset of X parts parts the parts Automatically feed back ~70-100% of tool offset 26/11/2018 Slide 30
Tool Offset Window in Equator 26/11/2018 Slide 31
Example IPC – One to One Ethernet cable 26/11/2018 Slide 32
Automated close loop feedback for Tool Offset Tool Offset Window in Machine Tool Tool Offset Window in Equator Controller confirming the offset confirming the offset value, Tool No value, Tool No and Machine. and Machine. 26/11/2018 Slide 33
Close loop feedback for Tool Offset ensuring consistently controlled process 26/11/2018 Slide 34
26/11/2018 Slide 35
Industry current requirement's & key objective’s S.No Production Quality 1 In process Setting of Tool wear drifts To eliminate bottle neck at CMM Lab. 2 Zero rejection To supply inspection data asap to help production give correction 3 In process setting of Position drifts w.r.t drawing To check parts as per quality drawing inclusive of datums dimensional and GD&T parameters like circularity, flatness etc. 4 Having inspection data at Point of manufacturing To record data for future traceability 5 Operation wise data to avoid taking any action correction before going for next OP 6 Lesser dependency on end of line inspection just for segregating parts for OK and Not OK 7 Achieve better Cp & Cpk values always. 26/11/2018 Slide 36
Recommend
More recommend