Materials testing Why Test? Determine the reasons for failure - PDF document
Materials Testing BSSM Workshop on Experimental Mechanics 9 th March 2018 - Peter Fuller Topics covered today: Objectives Materials Testing why? Understand the Popular types of machines used for materials testing fundamentals of
Materials Testing BSSM Workshop on Experimental Mechanics 9 th March 2018 - Peter Fuller Topics covered today: Objectives • Materials Testing – why? Understand the • Popular types of machines used for materials testing fundamentals of Electro-Mechanical / Servo- Hydraulic / Servo Electric materials testing • Common Test Types & Gripping • Strain – Definition and Measurement • Modulus • Load/Extension vs. Stress/Strain • Yield Strength • Load Cells & Alignment • Extensometers • Test Conditions • References 2 Materials testing • Why Test? • Determine the reasons for failure • Predicting behaviour of materials under different conditions • Develop new processes and materials • Find more cost effective materials • Maintain quality • Safely reduce amount and/or cost of materials used • Select materials to match application • Analyse what went wrong 3
Tensile testing Why Tensile testing • - Most fundamental type of mechanical test • Simple • Relatively inexpensive • Repeatable • Discover its strength and how much it will elongate • Other simple test types: • Hardness – relationship to tensile strength • Flexure • Compression 4 Tensile testing • Electro Mechanical Rotary electric motor, via toothed belt drive Typically <500kN • Servo-Hydraulic High pressure oil & Servo Valve High Capacity • Electro Dynamic Linear electric motor (Newer Technology) <10kN All of these can perform Quasi-static tests. Servo Hydraulic & Electro Dynamic can also perform higher speed dynamic tests to accelerate failure 5 Classic Tensile Testing Machine Typical 100kN Tensile Testing machine (Cutaway view of an Instron 5500 series Electromechanical machine) • Applies force in compression or tension at a constant rate: Either in mm/min, % strain/min, or N/min • Used for quasi-static unidirectional, or slow cyclic tests • Records data throughout the test to produce a typical stress/strain curve 6
Fatigue Testing Machine • Applies cyclic loading to the specimen • Applies force in compression or tension at a constant rate: Either in mm/min, % strain/min, or N/min. • Some systems can also apply simultaneous torsional loads • By varying the frequency and amplitude of the test, you can determine how the material behaves in repetitive cyclic situations and predict failure Typical 100kN Fatigue Testing machine (Instron 8801 Servo Hydraulic) 7 Common Test Types Flexure Tensile Compression 8 System Compliance Crosshead and base Load cell deflection deflection Deflection L o + ΔL L o Zero load Loaded Zero load Loaded Compressed lead Grip, jaw face screw and drive and adaptor system deflection deflection 9
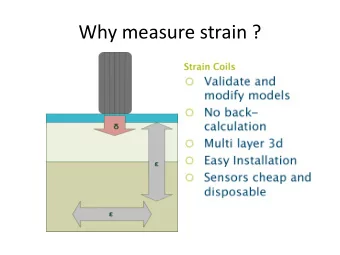
Strain • Strain is the Ratio of change in extension per unit length (%) • Elastic region – Hooke’s law states: ‘Within the elastic limit, the extension of a material is proportional to the applied force’ • Extensometers: Used to measure strain accurately Axial; Transverse; Dual Averaging; Clip-on; Non-Contact; LVDT (linear Variable Displacement Transducer); Bonded strain gauges • What is strain rate? • Change in Specimen Length/Original Cross Sectional Area/Time • Change in strain per unit of time (in/in/min, mm/mm/s, %/s, s -1 ) • Typically measured with an extensometer 10 10 Strain Axial Strain: Ratio of change in extension per unit length. (gauge) length Transverse Strain: Ratio of change in specimen width/diameter 11 11 Modulus • The modulus of elasticity is a measure of the stiffness of the material – Hooke’s Law • After ‘Yield’ the curve is no longer linear and deviates from the straight-line relationship, Hooke's Law no longer applies and some permanent deformation occurs in the specimen • This point is called the ‘elastic’, or ‘proportional limit’. After this, the material reacts ‘plastically’ to any further increase in load or stress. It will not return to its original, unstressed condition if the load were removed. 13 13
Modulus Different types of modulus calculation: 14 14 Load vs. Extension & Stress vs. Strain A ‘load’ vs. ‘extension’ graph, has limited use: If ‘Load’ is converted into ‘Stress’ (load per unit cross sectional area) and extension is converted into a percentage of the original specimen length, or ‘strain’, direct comparisons can be made from the results carried out on different size and shape specimens NB - The shape of the ‘load-extension’ diagram does not change when converted to a ‘stress-strain’ diagram 15 15 Stress Strain Illustration For many materials, during the initial portion of the test, the relationship between the applied force, or stress and the elongation, or strain is linear. Common S.I. measuring units used in tensile testing: Stress (σ): Pascal (Pa) (N/m 2 ), or more commonly MPa & GPa 16 16
Test Conditions • The correct and consistent strain rate must be used to ensure consistent results 18 18 Strain Control Testing (i.e. EN6892-1) Yield point Strain rate 20% error bounds R p0.2 Speed change Tensile stress Automatic control The test system automatically calculates the optimum control parameters dynamically during the test for changing specimen cross-section and stiffness, removing any setup or operator influences. 20 20 Load Cells 1 • Deform elastically under load • Deformation measured with strain gauges and calibrated as Load or Force • Accuracy – Typically ±0.5% of reading • Range - Typically 1 – 100% of capacity • Potential Errors: - Off-axis loading - Range - Calibration - Mass Intertia - Overloading - Temperature Variation Common S.I. measuring units used in tensile testing: Force (or Load): Newtons (N) & (KN) 21 21
Load Cells & Alignment • Alignment: Angularity & Concentricity • Why do we need good alignment? • Compliance to Nadcap is of increasing importance to laboratories around the world • The purpose of these standards is to ensure that testing in the laboratory is done consistently and to ensure aerospace manufacturers that the materials provided them by suppliers have been tested under the correct test conditions. Good alignment = good results! 22 22 What is Alignment? Alignment and how to measure and adjust Strain Measurement Different methods of measuring strain Machine Contacting Non-Contacting Digital Image Displacement Extensometry Extensometry Correlation Strain Gauges Laser Strain along a line Clip-on Optical 2D Map Extensometers Automatic Video 3D Map Contacting 24 24
Extensometers - Contacting 25 25 Non-Contact Extensometry 50kN Instron machine shown with non contact (Video) Extensometer Where ‘Lo’ is the gauge length Camera tracks marks on the specimen to measure strain Strain control demo 26 26 Digital Image Correlation Instron machine shown with non contact (Video) Extensometer & DIC Replay 27 27
Questions 28 28
Recommend
More recommend
Explore More Topics
Stay informed with curated content and fresh updates.
