Inspection Methods for Characterizing Subsurface Impact Damage in - PowerPoint PPT Presentation
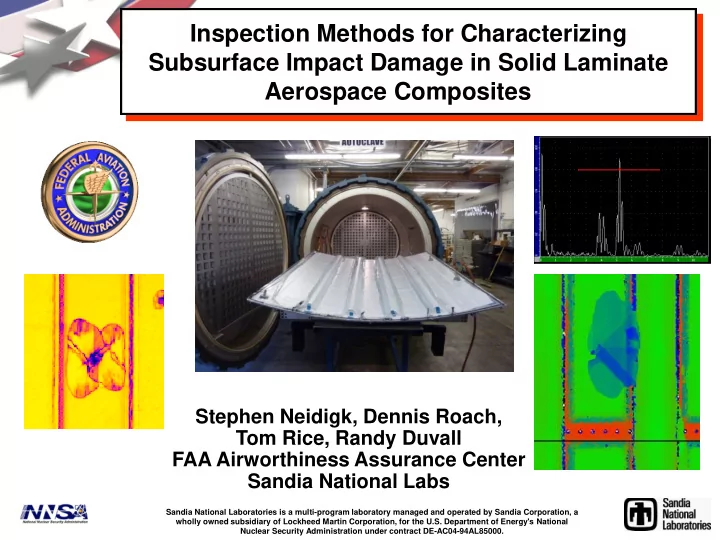
Inspection Methods for Characterizing Subsurface Impact Damage in Solid Laminate Aerospace Composites Stephen Neidigk, Dennis Roach, Tom Rice, Randy Duvall FAA Airworthiness Assurance Center Sandia National Labs FAA William J. Hughes Sandia
Inspection Methods for Characterizing Subsurface Impact Damage in Solid Laminate Aerospace Composites Stephen Neidigk, Dennis Roach, Tom Rice, Randy Duvall FAA Airworthiness Assurance Center Sandia National Labs FAA William J. Hughes Sandia National Laboratories is a multi-program laboratory managed and operated by Sandia Corporation, a wholly owned subsidiary of Lockheed Martin Corporation, for the U.S. Department of Energy's National Technical Center Nuclear Security Administration under contract DE-AC04-94AL85000.
Presentation Outline Introduction and Background Motivation Ice Impact Damage on Laminate Plates Side-by-Side Inspection Comparison of NDI Techniques Full-Scale Panel Impact Testing Conclusions • Simulated Hail • Blunt • Hardened FAA William J. Hughes Technical Center
Program Motivation - Extensive/increasing use of composites on commercial aircraft and increasing use of NDI to inspect them Composite Structures on Boeing 787 Aircraft Carbon laminate Carbon sandwich Fiberglass Aluminum Aluminum/steel/titanium pylons Composite Center Wing Box A380 Pressure Bulkhead Program Goals: Assess & Improve Flaw Detection Performance in Composite Aircraft Structure FAA William J. Hughes Technical Center
Sources of Damage in Composite Structure Ground Support Lightning Equipment Impact Strike on Thrust Reverser Bird Strike Towing Damage Lightning Strike on Fuselage FAA William J. Hughes Technical Center
Inspection Challenge – Hidden Impact Damage Internal delamination from ice impact 44 in 2 Delamination Extent of visible damage Damage from ground vehicle Extent of Visible Significant Damage from Outside Internal Damage FAA William J. Hughes Source: Carlos Bloom (Lufthansa) & S. Waite (EASA) Technical Center
AANC Composite Programs • Industry wide NDI Reference Standards • NDI Assessment: Honeycomb Structures • NDI Assessment: Solid Laminate Structures Inspection • Composite Heat, UV, and Fluid Ingress Damage Task Group • Composite Repairs and Porosity • Composite NDI Training and NDI Proficiency Specimens Composite Impact Study Multiple impact parameters must be studied – hardness of impactor, low mass-high velocity impact, high mass-low velocity impact, angle of impact, surface demarcations & visual clues, panel stiffness – Identify which impact scenarios are of major concern to aircraft maintenance – Identify key parameters governing impact damage formation – Relate damage threat & structural integrity to capabilities of NDI to detect hidden impact damage in laminates – Develop methodology for impact threat characterization FAA William J. Hughes Technical Center
Ice Impact Testing at UCSD UCSD High Velocity Gas Gun Still Images from 61 mm Ice Impact on 8 Ply Carbon Panel at 72 m/s FAA William J. Hughes Joint Effort: UCSD (Prof. Hyonny Kim) Technical Center
Damage in Composite Laminates from Ice Impact D = Impactor Dia. H = Panel Thickness Impact-Induced Damage Morphology for 8 Ply Panel; Failure Threshold (Energy) Velocity 42.7 mm Ice at 120.4 m/s (267 J) Selected panels were sectioned and observed by microscopy to map out the damage. The laminates develop the series of classic peanut shaped delaminations/fractures that stack together to give the overall appearance shown in the scans FAA William J. Hughes Technical Center
Composite Impact Study – Hail Impact Task Description • 112 carbon composite panels were fabricated using BMS8-276N uniaxial material; consisted of 8, 16, and 24 ply configurations (12” x 12”) • All panels were impacted with ice balls of different diameters and velocities to simulate hail and create various levels of impact damage • The goal was to create damage associated with Failure Threshold ~ BVID range & complete NDI to evaluate the sensitivity of each method in detecting and sizing the damaged area (reliable, sensitive, gate deployment, cost effective) • NDI methods used for this evaluation include: Through Transmission Ultrasonics (TTU), Phased Array UT, Pulse-Echo UT, Resonance, Flash Thermography, Damage Checker (PE-UT), Mechanical Impedance Analysis, Low Frequency Bond Test FAA William J. Hughes Joint Effort: UCSD (Prof. Hyonny Kim) Technical Center
Composite Impact Damage – Inspection Methods Deployed MAUS PE TTU Thermography MAUS MAUS MIA Resonance FAA William J. Hughes Technical Center
Composite Impact Damage – Inspection Methods Deployed MAUS LFBT V-95 (Mechanical Impedance Analysis) Damage Check Device (Pulse-Echo UT) Omniscan Phased Array UT FAA William J. Hughes Technical Center
Example Result TC-16-25 525.1 Impact Energy (J) - _____________ Flaw Size MAUS PE (mm²) - ________ 37,128 Impact Velocity (m/s) - _________ 212.44 Flaw Size Omniscan PE (mm²) - ________ 28,380 Projectile Size (mm) - _______ 38.1 Flaw Size TTU UCSD (mm²) - _______ 26439 Picture TTU MAUS PE Omni PE IR Omni PA Ramp Damage Checker MAUS Resonance (flaw indicated) Y Laser UT FAA William J. Hughes Imp. area Good area Technical Center
Example Result 1,268.1 Impact Energy (J) - _____________ TC-24-19 Flaw Size MAUS PE (mm²) - ________ 9,413 Impact Velocity (m/s) - _________ 153.46 Flaw Size Omniscan PE (mm²) - ________ 9,439 Projectile Size (mm) - _______ 61 Flaw Size TTU UCSD (mm²) - _______ 8,022 Picture TTU MAUS PE Omni PE IR Omni PA Ramp Damage Checker MAUS Resonance (flaw indicated) Y FAA William J. Hughes Imp. area Good area Technical Center
Example Result TC-08-29 306.7 Impact Energy (J) - _____________ Flaw Size MAUS PE (mm²) - ________ 703 Impact Velocity (m/s) - _________ 99 Flaw Size Omniscan PE (mm²) - ________ 554 Projectile Size (mm) - _______ 50.8 Flaw Size TTU UCSD (mm²) - _______ 0 MAUS PE Picture Omni PE TTU IR Omni PA MAUS Resonance Ramp Damage Checker (flaw indicated) N A-scan Ref FAA William J. Hughes Good area Imp. area Technical Center
Full-Scale Fuselage Test Panel Fabrication Not flat, simple structures Skin - Curved Construction Autoclave Cured (350 ° F at 90 psi) Hat Section Stringer Tapered Region Quasi-Isotropic Lay Up [0,+45,90.-45] 2(s) T800 unidirectional pre-preg tape with a 3900 series resin system (BMS8- 276) FAA William J. Hughes Technical Center
Full-Scale Fuselage Test Panels 2 Coats of epoxy primer Fastened Shear Ties Jet Glow Express 4’8” Tall Paint Co-Cured Stringer 6’4” Wide 16 Ply Skin FAA William J. Hughes Technical Center
Impact Locations of Interest 6’4” 4’8” A A Section A-A Stringer 4 • On the skin between the stringers (1) Skin • at the stringer/skin interface (2a-c) • directly over the center of the stringer (3) • at the shear-tie/skin interface ((4)not 2c shown) 3 2a 1 Ice Impact - Joint Effort: UCSD FAA William J. Hughes 2b Technical Center (Prof. Hyonny Kim and Jacqui Le)
C-Scan Inspection Interpretation Pristine Area Fully disbonded Fully bonded stringer flange stringer flange Interply delamination in Partially delaminated the skin stringer flange FAA William J. Hughes Technical Center Select Impact Damage Examples
Comparison of NDI Techniques UT Amplitude UT Time of UT Resonance Flight TOF and Resonance enhance detection of small disbonds FAA William J. Hughes Technical Center
Ice Impact Testing Results 2.4 in diameter simulated hail impact tests were Mid-Bay Impacts conducted between 50 and 120 m/s. Terminal velocity ~ 30 to 35 m/s) • Induce both interply delamination and substructure disbonding • No damage was visually detectable from the surface • Damage was initiated at approximately 230 Joules (~67 m/s) UT Resonance Y-Plot Stringer Flange Impacts • Induce only substructure flange disbonding • No damage was visually detectable 383.2 Joules 278.9 Joules from the surface (0.0) / (23.16) (0.0) / (16.09) • Damage was initiated at FAA William J. Hughes approximately 170 Joules (~56 m/s) Technical Center
Ice Impact Testing Results Stringer Flange Impacts 89 m/s 56 m/s Initiated substructure disbonding only, no interply delamination detected with these impacts FAA William J. Hughes Technical Center
Mid-Stringer Impacts Ice Impact Testing Results • Induce both interply delamination and substructure disbonding (mostly flange disbonding) • No damage was visually detectable from the surface • Possible to initiate damage at less than 400 Joules 388.1 Joules Shear Tie Impacts • Induce built-up pad section delamination and cracked shear ties • Damage was visually detectable from the surface (cracks, surface markings at approximately 700 Joules (115 m/s)) Unique inspection challenge! FAA William J. Hughes All shear tie impacts cracked the impacted shear tie Technical Center
iPhoton Solutions Full Panel Inspection Results iPLUS™ Technology • Laser ‐ ultrasonic systems for the inspection of composites • Conventional pulse ‐ echo ultrasonic NDT results • High speed testing of complex shape composites • Uses commercial articulated robots Displacements are detected by a second laser beam and an interferometer FAA William J. Hughes Technical Center
Significant Damage with No Visual Indication 40 inch stringer disbond Co-cured stringer 54 in 2 Interply delamination FAA William J. Hughes Technical Center
Recommend
More recommend
Explore More Topics
Stay informed with curated content and fresh updates.
