ADVANCEMENTS IN NON DESTRUCTIVE TESTING By Peter Roosevelt, GE - PowerPoint PPT Presentation
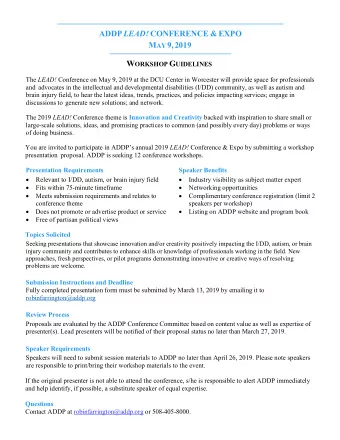
And Our Sponsors Proudly Present ADVANCEMENTS IN NON DESTRUCTIVE TESTING By Peter Roosevelt, GE Inspection Services Wednesday, February 8, noon @ Shaker Ridge Country Club, 802 Albany Shaker Rd, Loudonville This is a technical presentation
And Our Sponsors Proudly Present “ADVANCEMENTS IN NON ‐ DESTRUCTIVE TESTING” By Peter Roosevelt, GE Inspection Services Wednesday, February 8, noon @ Shaker Ridge Country Club, 802 Albany Shaker Rd, Loudonville This is a technical presentation on inspection tools, techniques, standards and codes. The presentation will include a discussion of the capability of ultrasonic scanning devices to evaluate the integrity of tank shells, piping and welds. GE Inspection Services is bringing some of their field equipment for us to see. RSVP through February 6 by registering on ‐ line at http://awmaneny.org/ or by emailing Heather Fariello, AWMA Secretary, awmaneny@gmail.com Students $10, Members $20, Guests $25, Annual ( calendar ) dues: Individual $25 or Corporation $150 (Corp representatives pay Member fees) Upcoming Events March 8: Status of DEC Air regulations, by Bob Stanton, NYSDEC
Ultrasonic Testing Basics Pete Roosevelt GE Inspection Services 518.649.3587
ULTRASONIC TESTING • Review of Ultrasonic Testing Techniques • Manufactured industrial materials sometimes have characteristics that adversely affect the product’s intended use • A small crack in steel used to build a bridge can grow to a size that reduces the steel’s strength impairing safe operation • Ultrasonic testing is one of the NDT methods used to detect cracks and other service threatening conditions • These conditions can lead to premature failure
ULTRASONIC TESTING
ULTRASONIC TESTING
ULTRASONIC TESTING
ULTRASONIC TESTING
ULTRASONIC TESTING • Display Unit • Once echo signals have been amplified they are ready to be displayed in modes that provide information about the location and nature of echo surfaces within the test object • Three general formats are commonly used: – A-scan – B-scan – C-scan
ULTRASONIC TESTING • A-Scan • Most common display is the A-scan • The vertical axis represents signal strength • The horizontal axis represents time and displays pulse signal amplitude variations with increasing time from a specific reference point • The reference point at the left side of the display is usually the moment when the transducer is first excited with an electric pulse • Sometimes called the initial pulse or main bang • An alternate A-scan display called an RF signal presents the signal with both positive and negative peaks
ULTRASONIC TESTING
ULTRASONIC TESTING • B-Scan Display • B-scan displays X-positional information in one direction and the time history of the horizontal scale of the A-scan in the other • The result is a cross-sectional slice of the reflectors associated with the test object • Since ultrasound reflects the strongest signal when it encounters a reflector surface at a right angle to its direction of propagation, the B-scan only shows horizontal components of the step wedge and internal reflectors • Internal flaws reduce the strength of any ongoing ultrasonic waves • A shadow of the internal reflector is often seen as a loss of signal in images of any subsequent reflecting surfaces • Gaps can appear in the continuity of the lines representing the wedge item surfaces
ULTRASONIC TESTING
ULTRASONIC TESTING • C-SCAN • In a C-scan display the transducer is scanned in a regular pattern of an area of interest • Often uses automated mechanical positioning devices • Received signals are converted to variations in color or grayscale density • Created using A-scan data • The plan view of the test object is generated using signal criteria based on pulse height and time of arrival to determine color or grayscale density at each X and Y location • Similar to a floor plan of a house representing horizontal and vertical directions over which the transducer was scanned • Resulting patterns tend to be directly correlated with the size and shape of the reflecting surfaces in the test object • Easy to interpret • Reflectors with sharply defined edges, the image is an accurate representation of the reflector size • Key measure of a C-scan is its ability to distinguish between closely spaced reflectors that exist at the same depth • The lateral resolution of the system is important and is related to the diameter of the sound beam at the depth of interest and the scanning step size • When images are created with narrow acceptance ranges and carefully correlated with depth information the C- scan rendition becomes a slice of a three dimensional rendering of the reflectors contained within the test object
ULTRASONIC TESTING
ULTRASONIC TESTING TRANSDUCERS cont’d • The frequency of a transducer is determined by the thickness of the piezoelectric element (crystal) • The thinner the crystal the higher the frequency • higher frequency sound beams produce higher levels of sensitivity and resolution • Less ability to penetrate test objects to great depths
ULTRASONIC TESTING • PENETRATION VERSUS SENSITIVITY AND RESOLUTION – A transducer is chosen to enhance the sensitivity (higher frequency) or provide greater ability to penetrate coarse grained materials or test objects of great depths (lower frequency) – Good penetrating ability in a transducer is provided by lower frequency (less 5.0 MHz). Lower frequencies produce longer wavelengths, countering the natural attenuation of the test material – Higher sensitivity and better resolution are achieved with higher frequencies (5 MHz and above)
ULTRASONIC TESTING • ACOUSTIC COUPLING • Ultrasonic waves require an intermediate medium to transfer the transducer’s mechanical motion to the test object • Coupling of the crystal to the test object is best done if the two are rigidly attached to each other • If gas, such as air is trapped between the transducer and the test object surface, virtually all sound energy is reflected at the transducer/air boundary • Liquid couplant is used as a transition medium between the two solid bodies • The transducer is in direct physical contact with the test object in contact testing. Successful acoustic wave transfer is best performed when a thin layer of couplant is between the transducer and test object, providing acoustic energy transfer and lubricating the sliding surfaces of the transducer and test object
ULTRASONIC TESTING • Welds • Welding is the most commonly used metals joining method • Most common structural item to be ultrasonically inspected in shop or field • Important for the ultrasonic technician to have a basic knowledge of most commonly used welding processes and be familiar with welding terminology • Prior to ultrasonic inspection of a weld the welding process used and the joint type (full or partial penetration) must be known to the technician. This information will give the technician an idea of what type of discontinuities may be present in the weld
ULTRASONIC TESTING • Weld Testing • Straight beam testing of welds can only be performed on welds that have had the weld reinforcement ground flush or from the back side of tee or corner welds • Only if permitted by the governing code or specification • Angle beam testing can be performed on – Full penetration butt welds – Corner and tee welds and pipe welds • The first step is to determine accessibility to the area of interest • Available distance back from the weld should be considered when selecting the wedge angle and determining the length of the scanning area • Three common weld configurations; butt welds in a plate, a corner joint made by two plate ends set at 90 ° angles to each other, and a tee joint between two plates (as typically seen in a structural beam-column connection)
ULTRASONIC TESTING
ULTRASONIC TESTING
ULTRASONIC TESTING
ULTRASONIC TESTING
ULTRASONIC TESTING
ULTRASONIC TESTING
ULTRASONIC TESTING • Equipment Calibration • Equipment used in ultrasonic testing involves electronic and mechanical devices working together to accurately capture the way ultrasonic waves interact with various features of test materials • This interaction is analyzed by measuring the strength and the nature of returning waves • Location of reflectors is deduced by knowing the direction of the wave’s propagation and the time elapsed in the wave’s travel from the sending source to the receiving device • The velocity of sound in the test object must be accurately known for distance estimations • In simple test object geometries such as plate materials, the testing instrument can be used to interpret such features as thickness and presence of major discontinuities
ULTRASONIC TESTING Straight beam and angle beam calibration using the IIW Block
ULTRASONIC TESTING Weld Discontinuities
ULTRASONIC TESTING Weld Discontinuities • Knowing the type of discontinuities that can occur in the various types of welds will help the technician understand what types of discontinuities may be expected in the weld
Recommend
More recommend
Explore More Topics
Stay informed with curated content and fresh updates.
