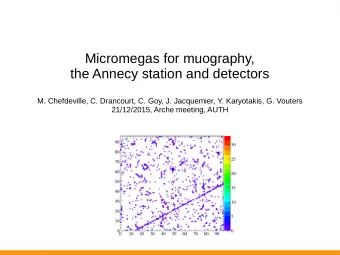
Calibration of Precise Large Area Micromegas Detectors Using Cosmic - PowerPoint PPT Presentation
Calibration of Precise Large Area Micromegas Detectors Using Cosmic Rays Maximilian Herrmann Ludwig-Maximilians-Universit at M unchen - Lehrstuhl Schaile 02.03.2017, Novosibirsk Instrumentation for Colliding Beam Physics M. Herrmann (LMU
Calibration of Precise Large Area Micromegas Detectors Using Cosmic Rays Maximilian Herrmann Ludwig-Maximilians-Universit¨ at M¨ unchen - Lehrstuhl Schaile 02.03.2017, Novosibirsk Instrumentation for Colliding Beam Physics M. Herrmann (LMU Munich) Calibration of Micromegas 02.03.2017, Novosibirsk 1 / 16
Outline Micromegas Principle 1 Position and Track Reconstruction Cosmic Ray Facility 2 Calibration and Potential Alignment by use of µ reference tracks and by partitioning of the detector area Calibration Results 3 Homogeneity and Efficiency of Large Area Micromegas 4 Summary 5 M. Herrmann (LMU Munich) Calibration of Micromegas 02.03.2017, Novosibirsk 2 / 16
MICROMEsh GAseous Structure μ ionized electrons drift cathode -300 V between cathode and Ar:CO 2 grounded mesh e - reconstructed gas amplification between 5 mm drift charge e - average t drift mesh and anode e - pillar charge collection on e - mesh 0V resistive strips amplification +570 V 0.128 mm charge detection on resistive strip anode readout strips readout strips positioning of strips with pitch 0.45 mm cluster of strips high accuracy mandatory calibration ⇒ determine position of strips using cosmic muons M. Herrmann (LMU Munich) Calibration of Micromegas 02.03.2017, Novosibirsk 3 / 16
Construction of a 1 m 2 Prototype Micromegas Al frame drift cathode stiffening panel gas volume stiffening panel PCB pillars Al plate strips mesh stiffening panels as support structure for anode and cathode two readout anode boards mesh mounted on drift panel (due to photolithographic limitations) gas volume enclosed by anode and cathode no alignment tooling used during gluing on Al plate potential deformation due to active area: 0.92 × 1 . 02 m 2 overpressure of Ar:CO 2 M. Herrmann (LMU Munich) Calibration of Micromegas 02.03.2017, Novosibirsk 4 / 16
Time Evolution of the Signal on a Single Strip beginning of the signal : fit by an inverse Fermi function p 0 f Fermi = 1 + exp[( p 1 − x ) / p 2 ] + p 3 1400 pulse height [ADC channel] 1200 90 % p 0 : maximal pulse height 1000 fi t ⇒ charge of signal 800 600 50 % p 1 : time of 50% 400 maximal pulse height 10 % 200 extrapolation p 2 : ∝ rise time 0 0 2 4 6 8 10 12 14 16 18 start time time [25 ns] p 3 : pedestal ⇒ 3 values of f Fermi at 10% , 50% and 90% define start time of signal by extrapolation M. Herrmann (LMU Munich) Calibration of Micromegas 02.03.2017, Novosibirsk 5 / 16
Position and Track Reconstruction centroid method ⇒ charge average over strips � x strip · q strip strips x centroid = � q strip strips drift time measurement TPC-like method α angle reconstruction by drift time measurement t drift � � pitch α = arctan slope fit · v drift x centroid M. Herrmann (LMU Munich) Calibration of Micromegas 02.03.2017, Novosibirsk 6 / 16
Cosmic Ray Facility: Calibration muon track trigger scintillator reference MDT chamber track 1 test Micromegas detector reference MDT chamber track 2 trigger scintillator 2D track reconstruction with two Monitored Drift Tube (MDT) chambers trigger via Scintillator hodoscope with coarse resolution ( ≈ 10 cm) in orthogonal direction M. Herrmann (LMU Munich) Calibration of Micromegas 02.03.2017, Novosibirsk 7 / 16
Cosmic Ray Facility facility to calibrate detectors in Garching near Munich MDT chambers : 2 . 2 m × 4 m ⇒ active area : 9 m 2 angular acceptance : ± 30 ◦ M. Herrmann (LMU Munich) Calibration of Micromegas 02.03.2017, Novosibirsk 8 / 16
Alignment by Use of Reference Tracks Idea: perpendicular perpendicular inclined track shift track track reference reference track detector track detector assumed position measured assumed detector position position shift detector under study under study measured position residual residual 5 residual in y [mm] Implementation: 250 4 residual = 3 200 pos measured − pos reference 2 1 150 residual vs. slope 0 of reference track − 1 100 − 2 ⇒ linear fit − 3 χ χ 50 2 2 / ndf / ndf 109.4 / 96 109.4 / 96 shift horizontal = intercept fit ± ± − intercept intercept 0.3986 0.3986 0.002805 0.002805 4 − − ± ± slope slope 0.3544 0.3544 0.01115 0.01115 − 5 0 shift vertical = slope fit − − − 0.6 0.4 0.2 0 0.2 0.4 0.6 slope reference track M. Herrmann (LMU Munich) Calibration of Micromegas 02.03.2017, Novosibirsk 9 / 16
Partitioning of the Detector Area 16 segments y two readout boards 14 0 7 8 APV z …………... …………... 1 15 128 with in 2048 strips channels x 16 APV25 frontend boards 10 segments ⇒ 16 segments in y direction 102 cm 10 cm resolution of scintillator hodoscope ⇒ 10 segments in x direction ⇒ 160 partitions PCB 1 PCB 2 a 100 × 57 . 6 mm 2 ` 92 cm ⇒ calibration and alignment for each of the 160 partitions individually M. Herrmann (LMU Munich) Calibration of Micromegas 02.03.2017, Novosibirsk 10 / 16
Deformation of the Drift Region due to Overpressure 0.3 tracks 0.2 cathode z [mm] 0.3 0.1 0.2 10 mbar 0.1 0 0 − reconstructed z position 0.1 − 0.2 − 0.1 mesh − 0.3 gas in gas out − 0.4 − 0.2 16 14 stiff base plate y [57.6 mm] 12 − 0 1 2 3 4 5 6 7 8 9 10 0.3 10 8 m ] m 6 0 0 1 [ − 4 x 0.4 2 drift gap deformation due to 0 small overpressure maximum deviation of 0 . 8 mm from central plane ⇒ 1 . 6 mm at cathode (stiff base plate support) deformation in agreement with finite element simulation 1.17 1.51 0 0.17 0.50 0.84 (ANSYS) Deformation [mm] M. Herrmann (LMU Munich) Calibration of Micromegas 02.03.2017, Novosibirsk 11 / 16
Result of Calibration: Shift and Rotation between Readout Boards mean residual y [mm] 0 − 0.1 mean residual y [mm] 0.1 0 − − 0.2 0.1 analysis of all 160 partitions − 0.2 − − 0.3 0.3 individually − 0.4 − 0.5 − 0.4 − 0.6 alignment of the right half of 10 − 0.5 9 0 x [100 mm] 8 the detector 2 7 4 6 6 5 − 0.6 8 4 3 10 ⇒ misalignment between PCBs 2 12 ] m 1 14 m 6 0 16 7 . 5 [ becomes visible y shift : 0 . 1 mm rotation : 0 . 35 mm / m 50 µ m effects are clearly observable M. Herrmann (LMU Munich) Calibration of Micromegas 02.03.2017, Novosibirsk 12 / 16
Impact of Calibration on Spatial Resolution 3 × 10 counts Entries Entries 160685 160685 25 Mean Mean − − 0.001863 0.001863 RMS RMS 0.3508 0.3508 Integral Integral 1.563e+05 1.563e+05 20 χ χ 2 2 / ndf / ndf 439.7 / 34 439.7 / 34 A A 2.375e+04 2.375e+04 ± ± 9.372e+01 9.372e+01 core core µ µ − − 0.0009471 0.0009471 ± ± 0.0007018 0.0007018 core core 15 σ σ 0.2102 0.2102 ± ± 0.0008 0.0008 core core A A 1854 1854 ± ± 42.8 42.8 centroid position reconstruction tails tails µ µ − − 0.00326 0.00326 ± ± 0.00414 0.00414 tails tails 10 σ σ 0.6635 0.6635 ± ± 0.0059 0.0059 tails tails fit residual distribution for each 5 angle with double Gaussian 0 − 2 − 1.5 − 1 − 0.5 0 0.5 1 1.5 2 plot narrow Gaussian width as residual in y at 0° [mm] residual width [mm] 0.9 function of angle fully calibrated 0.8 shift corrected ⇒ calibration improves resolution 0.7 not calibrated 0.6 improvement @ 0 ◦ : 0.5 0.4 ≈ 100 µ m 0.3 0.2 0.1 0 20 10 0 10 20 − − angle reference track [ ° ] M. Herrmann (LMU Munich) Calibration of Micromegas 02.03.2017, Novosibirsk 13 / 16
Investigation of Multiple Scattering weighted width 1.2 residual width [mm] no cut slope difference < 0.01 1 slope difference < 0.005 slope difference < 0.001 assumption: 0.8 slope difference < 0.0005 multiple scattering of muons 0.6 ⇒ broadening of residual 0.4 distributions 0.2 centroid residual distribution 0 − − 20 10 0 10 20 ° angle reference track [ ] fit with double Gaussian × 3 10 counts couts Entries Entries 127276 127276 ⇒ weighted sigma no cuts 12 Mean Mean 0.06446 0.06446 4000 RMS RMS 0.622 0.622 cut on slope differnce Integral Integral 1.233e+05 1.233e+05 3500 cut on slope difference of 10 χ χ 2 2 / ndf / ndf 550.6 / 44 550.6 / 44 A A ± ± 9462 9462 59.4 59.4 3000 core core µ µ reference tracks decreases ± ± 8 0.06263 0.06263 0.00158 0.00158 core core σ σ ± ± 0.3004 0.3004 0.0023 0.0023 core core 2500 A A ± ± 2282 2282 43.3 43.3 tails tails residual width by 350 µ m 6 µ µ ± ± 0.06882 0.06882 0.00440 0.00440 2000 tails tails σ σ ± ± 0.9064 0.9064 0.0066 0.0066 tails tails 1500 4 1000 2 500 0 0 − − − − − 2.5 2 1.5 1 0.5 0 0.5 1 1.5 2 2.5 ° residual in y at 0 [mm] M. Herrmann (LMU Munich) Calibration of Micromegas 02.03.2017, Novosibirsk 14 / 16
Recommend
More recommend
Explore More Topics
Stay informed with curated content and fresh updates.
